Events Page Management
Video Tutorial
(4 min)
What is the events page
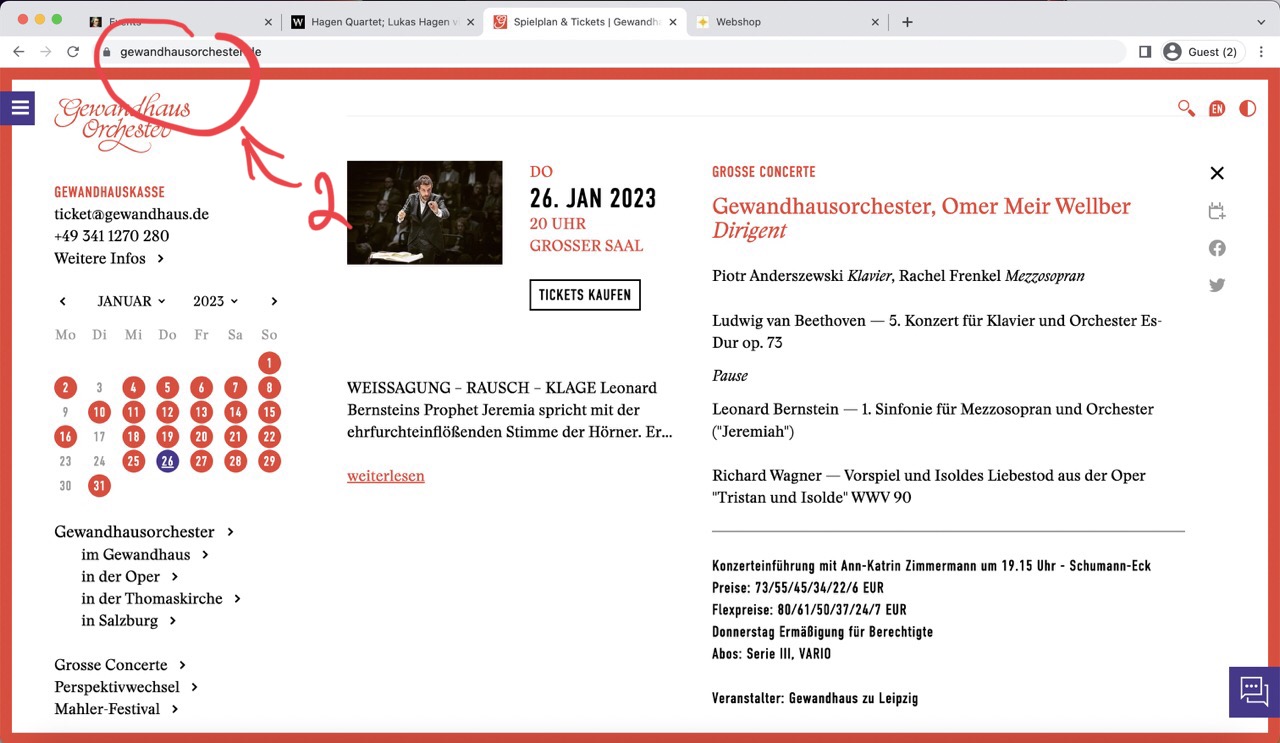
Check the events page demo and a single event demo that has detailed information about the event on your website.
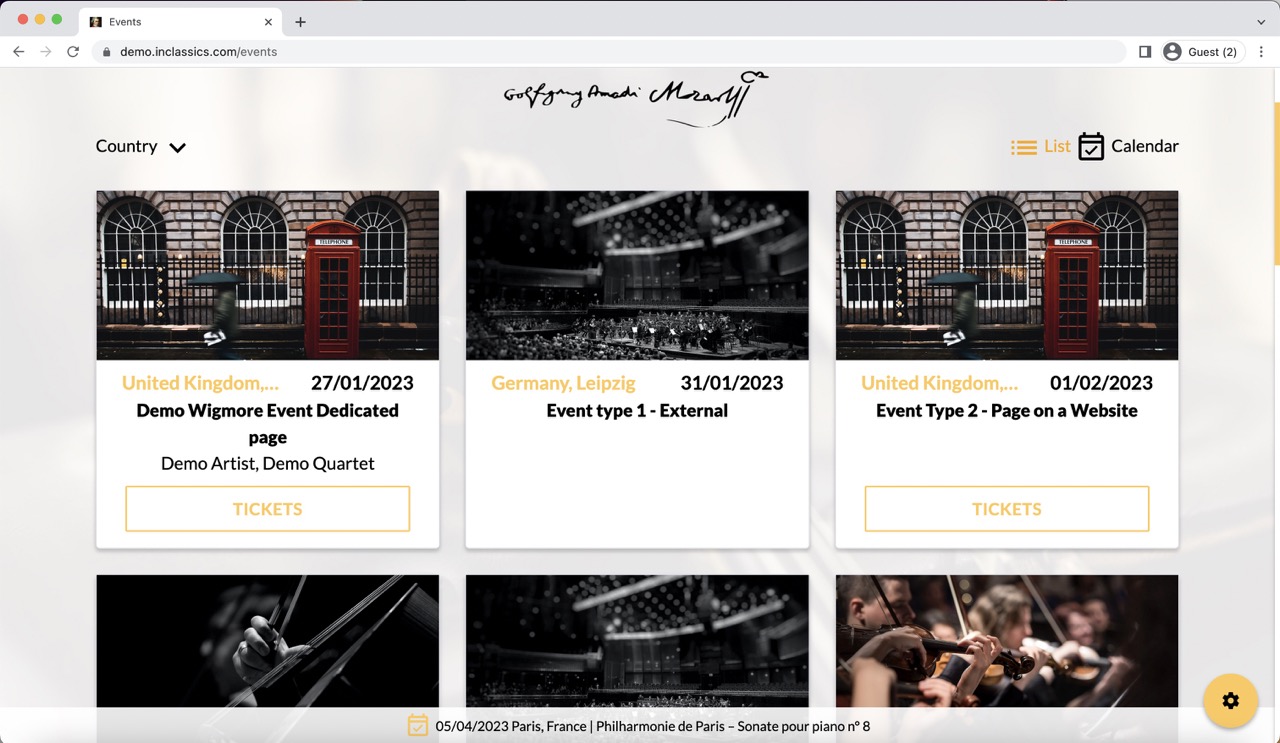
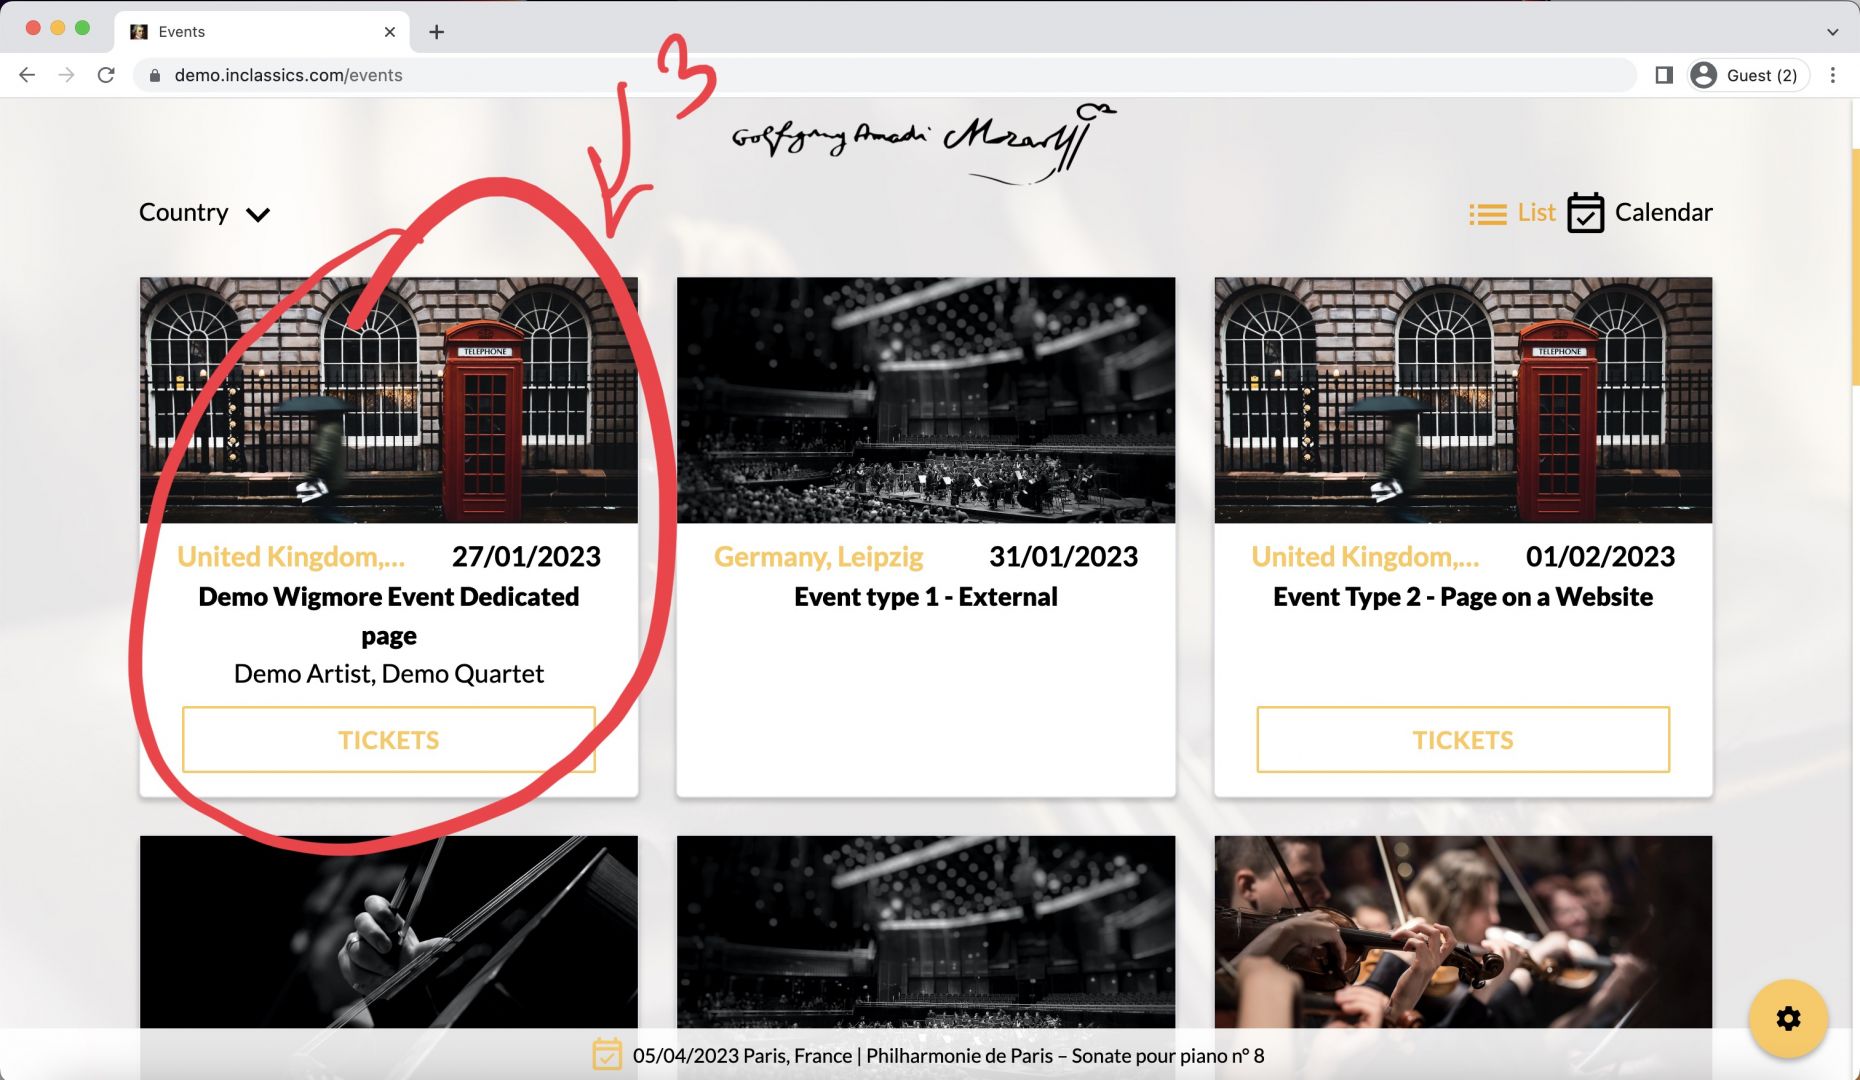
The events page displays the list of events you publish.
You don’t edit the events page directly (1) to add and manage your events, you add them in a separate folder (2) and they are automatically displayed on this page.
This helps to keep everything structured, organized and easy to manage.
Create an event
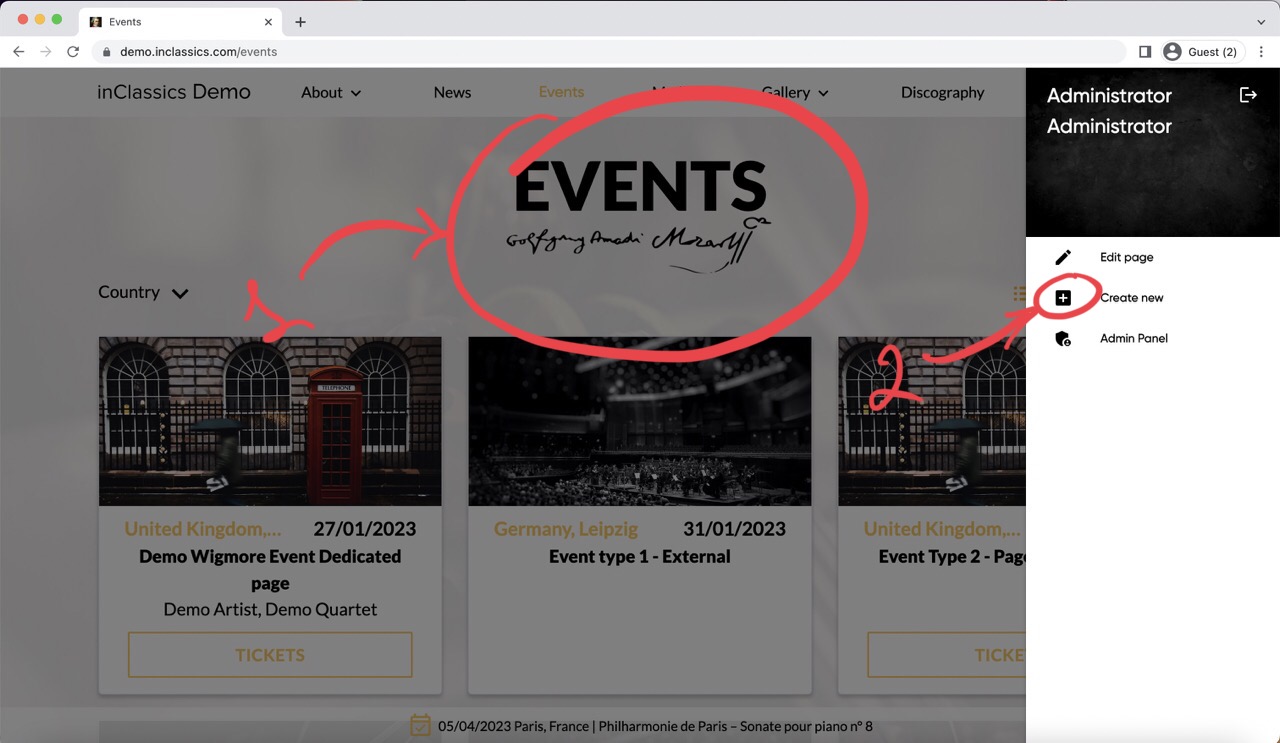
To create a new event:
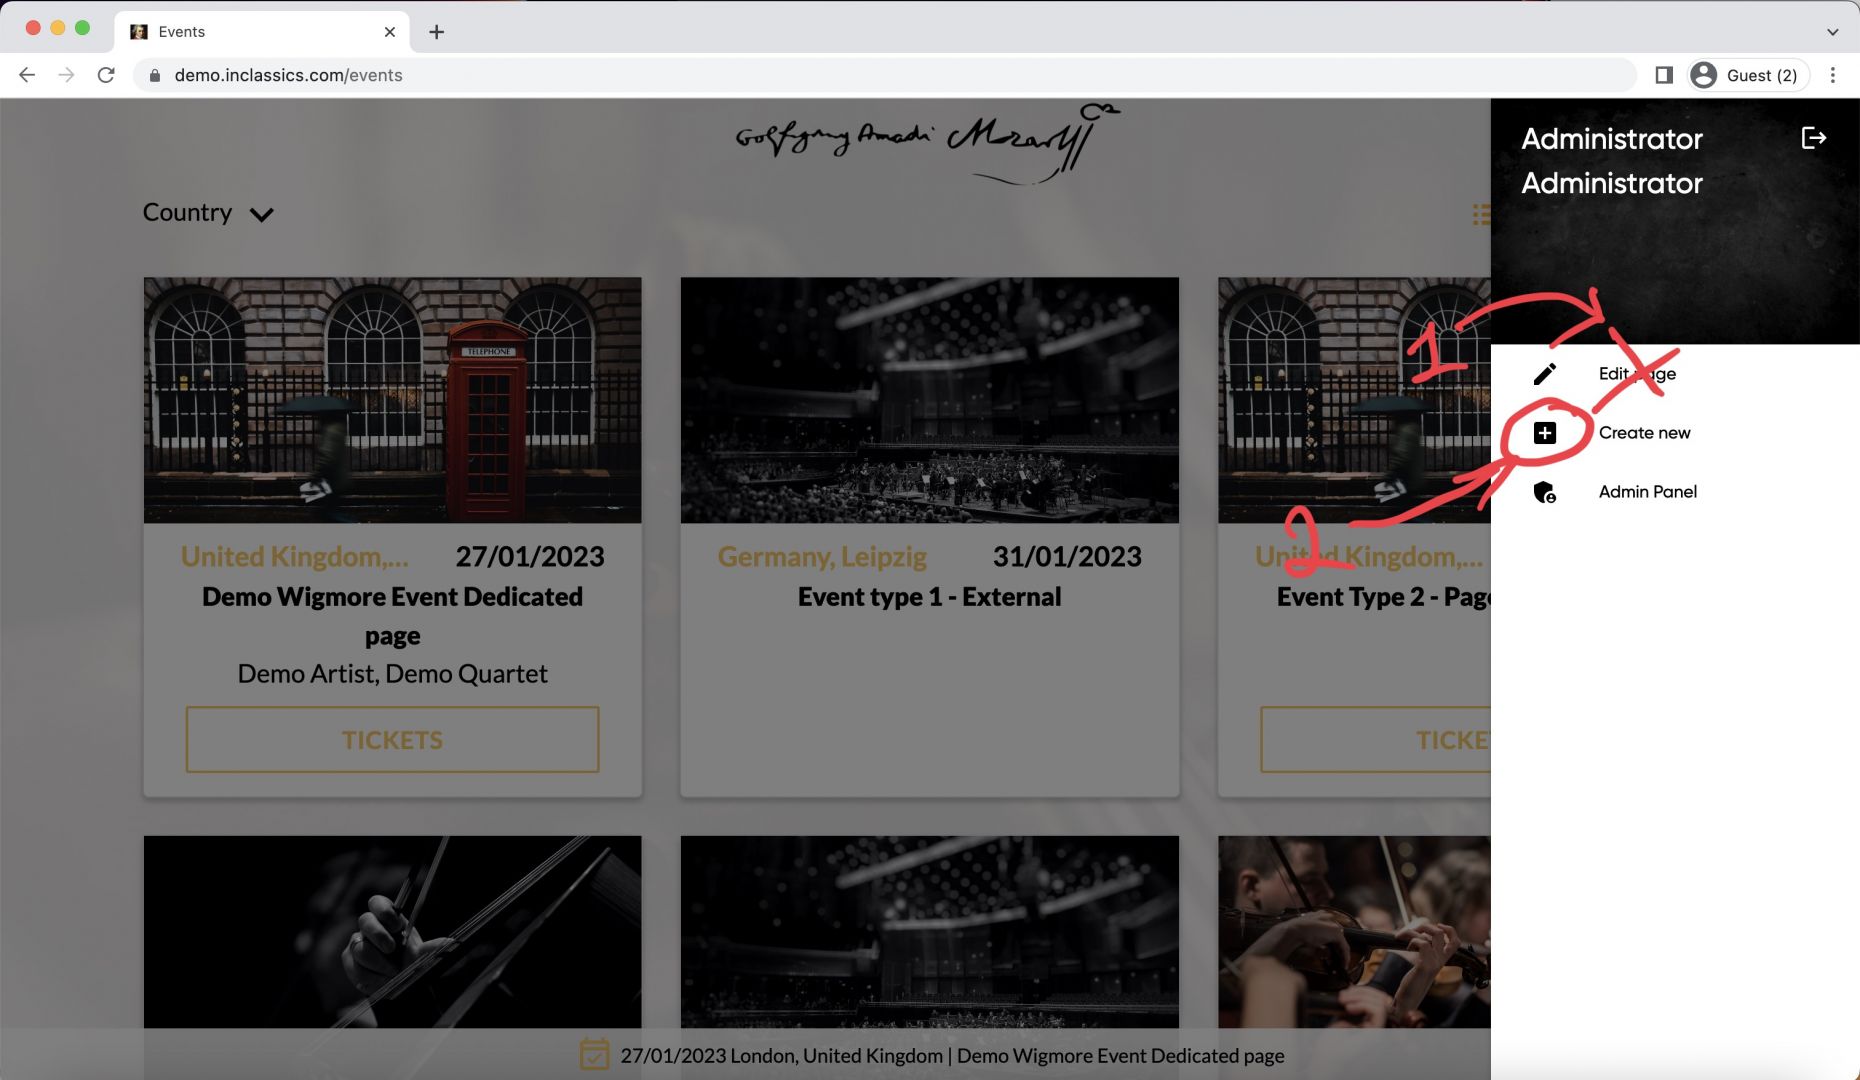
- go to your events page on your website (1)
- click on the settings button and click “create new” (2)
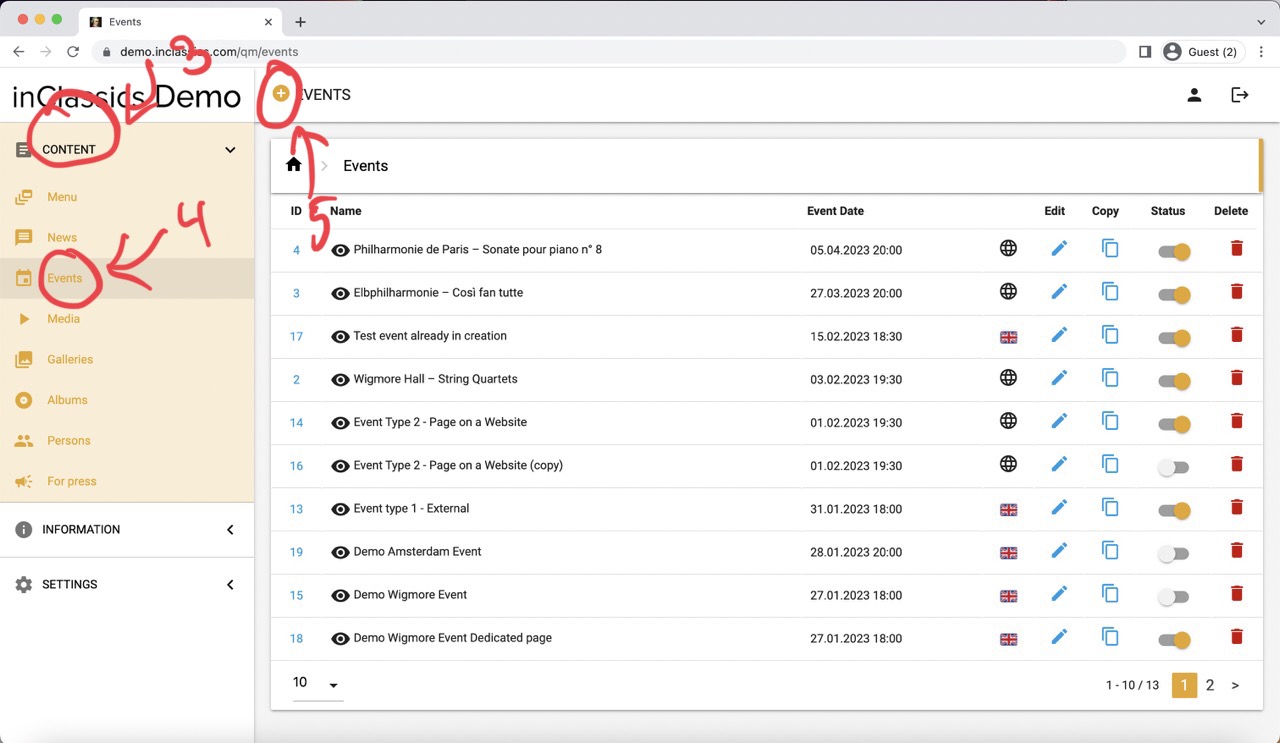
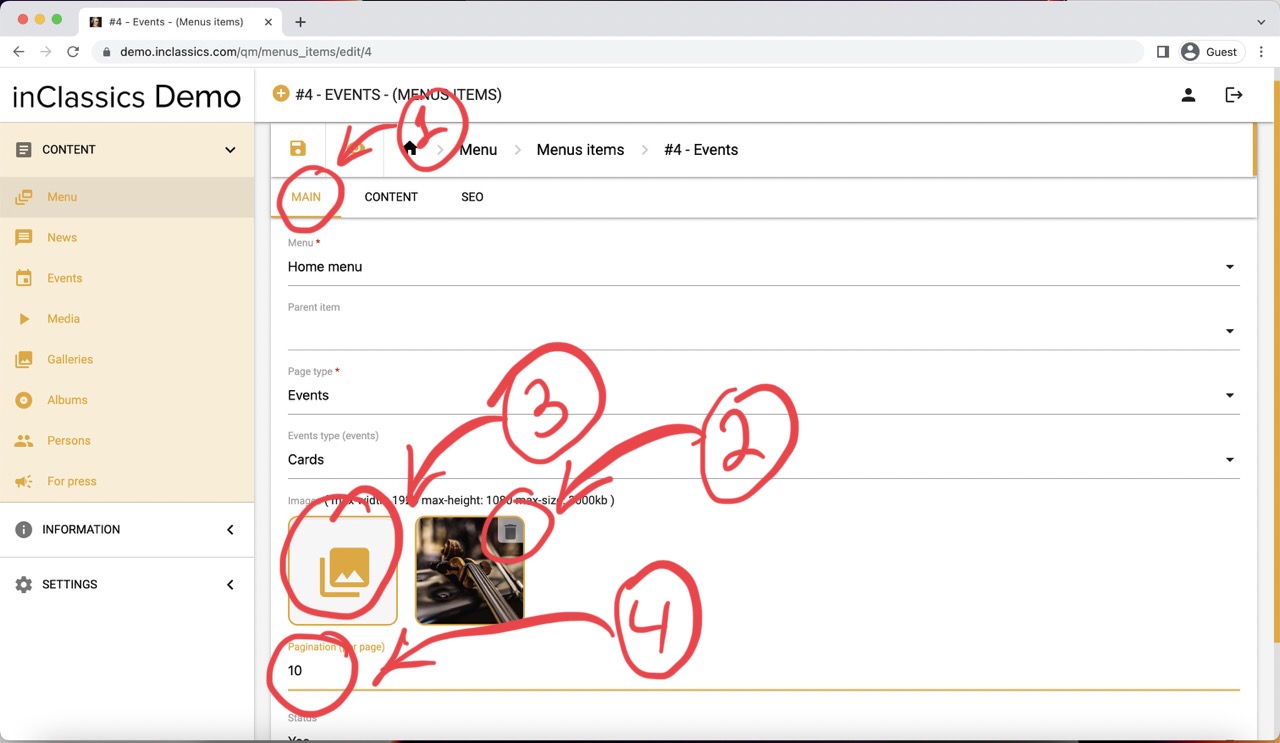
You can also do it from within your admin panel:
- go to the admin panel
- content tab (3)
- events (4)
- click on the plus icon next to “Event” (5)
Two types of events on your website
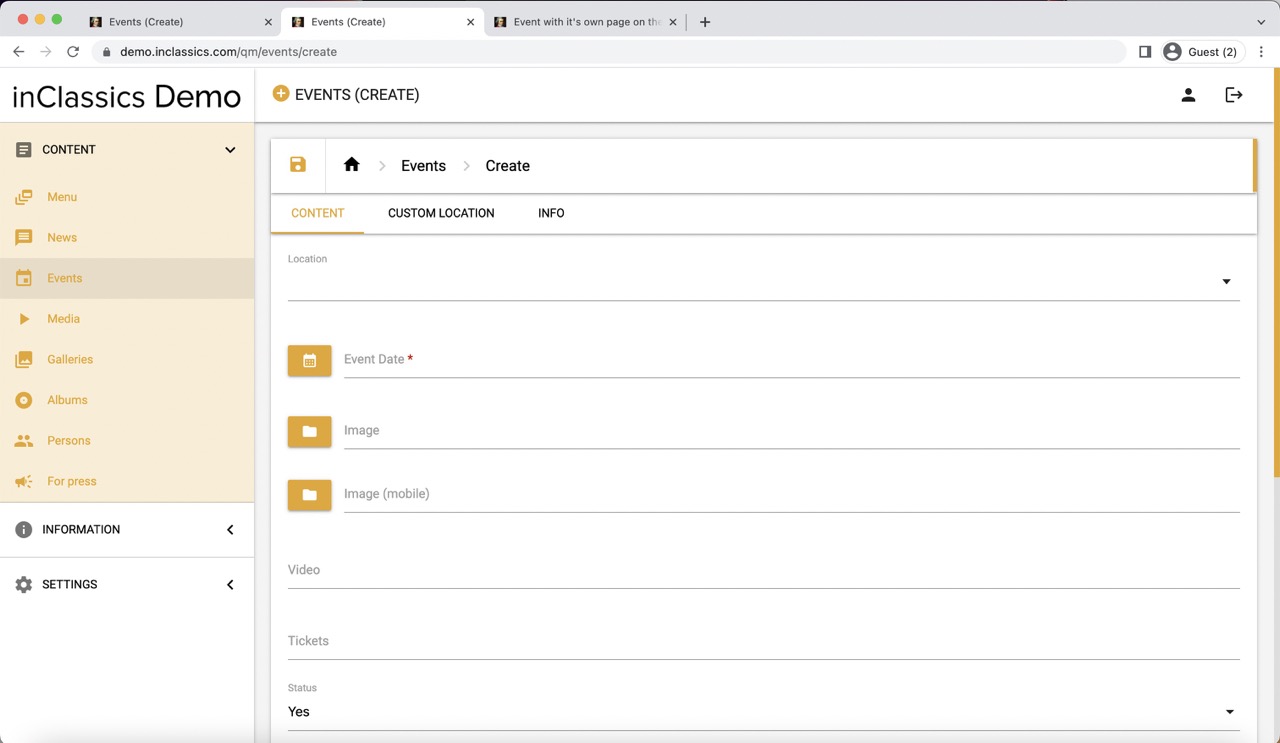
This will open a page where you can add information about your event and publish it.
There are two types of events on your website:
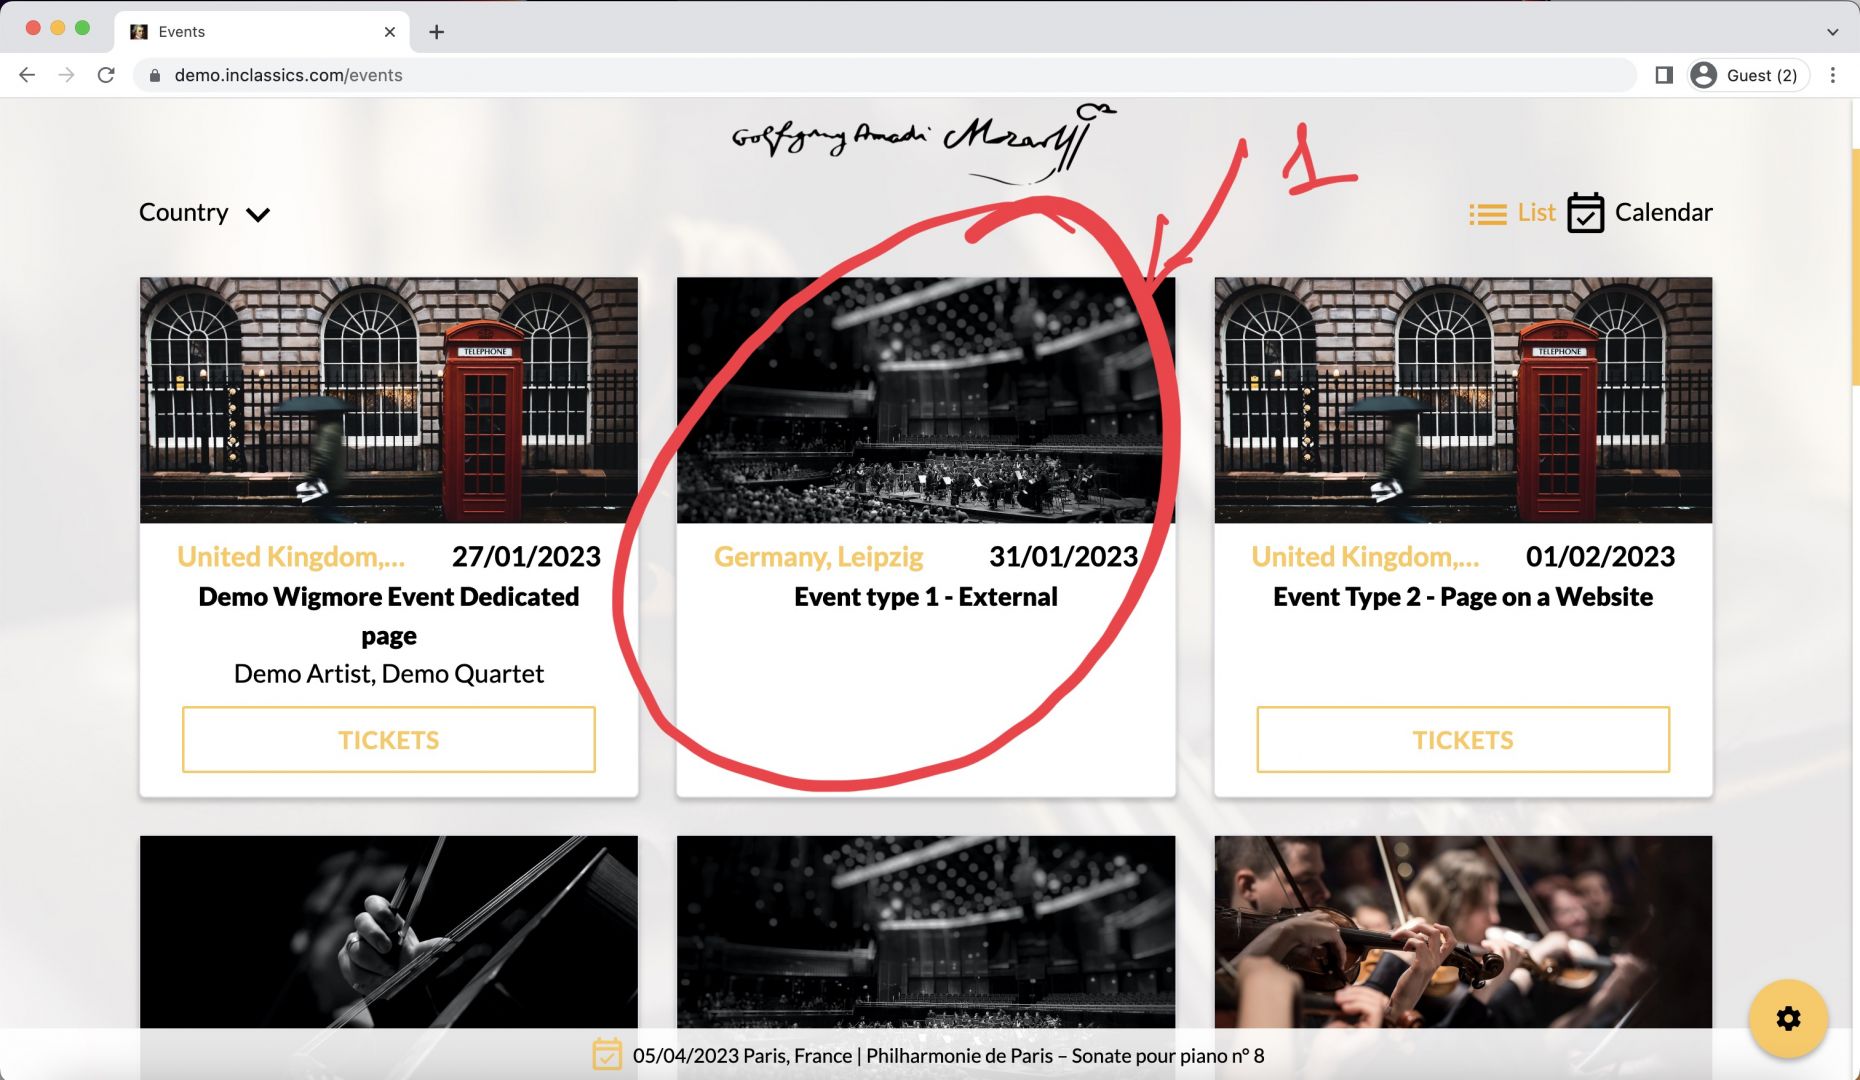
- an event with a link to an external website, clicking on the event (1) will open a link on the external website (2)
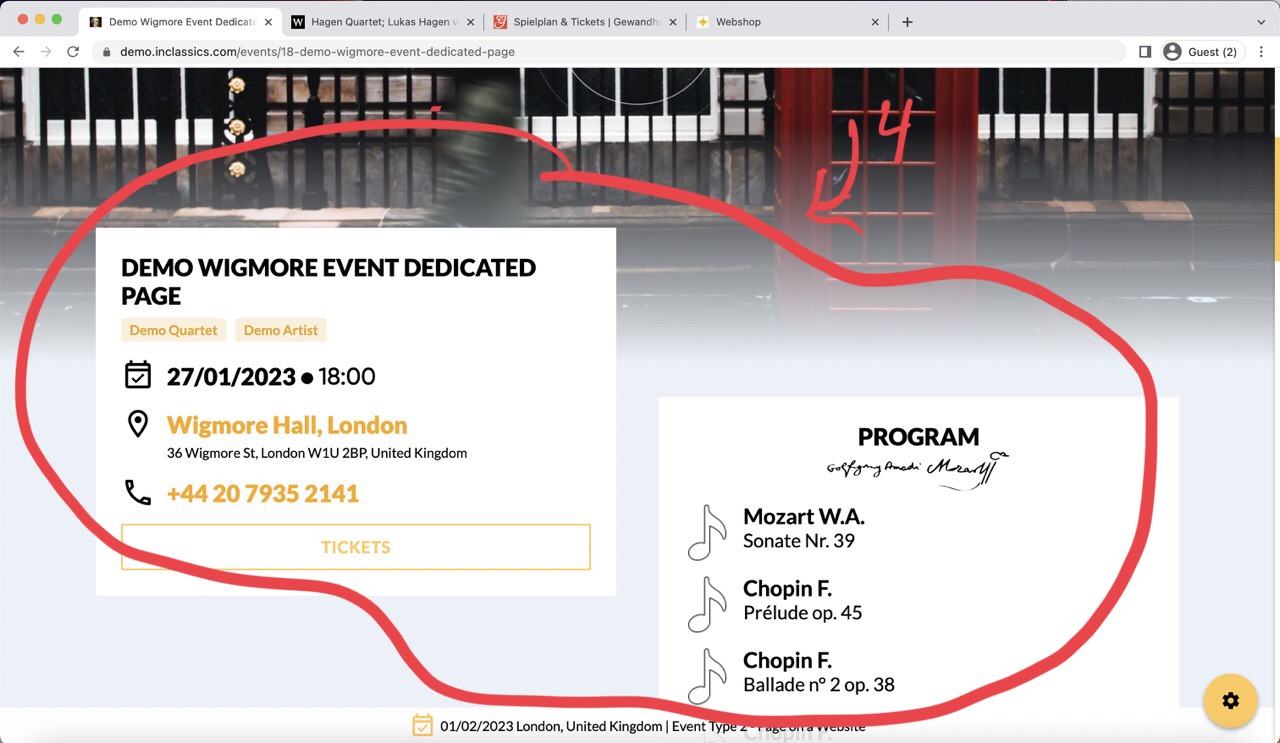
- an event (3) that has its own page on your website with additional information (4) (like programs, performers and so on)
Create an event with a link to an external website


- add the event's name (1)
- link to another website (note that it should add a full address starting with http or https) (2)
- alias field (3) is a link that will be displayed in the address bar, however, since you are adding an external link, the link of an external website will be displayed so you can ignore this field and leave it as is
- add event date and time (4)
TIP - if you don't know an exact time for your event add time 00:01, in that case the event time will be hidden from your website - if your design requires an image, don’t forget to add it too (5). For the best results, add an image with landscape orientation
- if the image is cut out too much on the phone, you can add a second image (6) with portrait orientation that will be displayed only on mobile devices
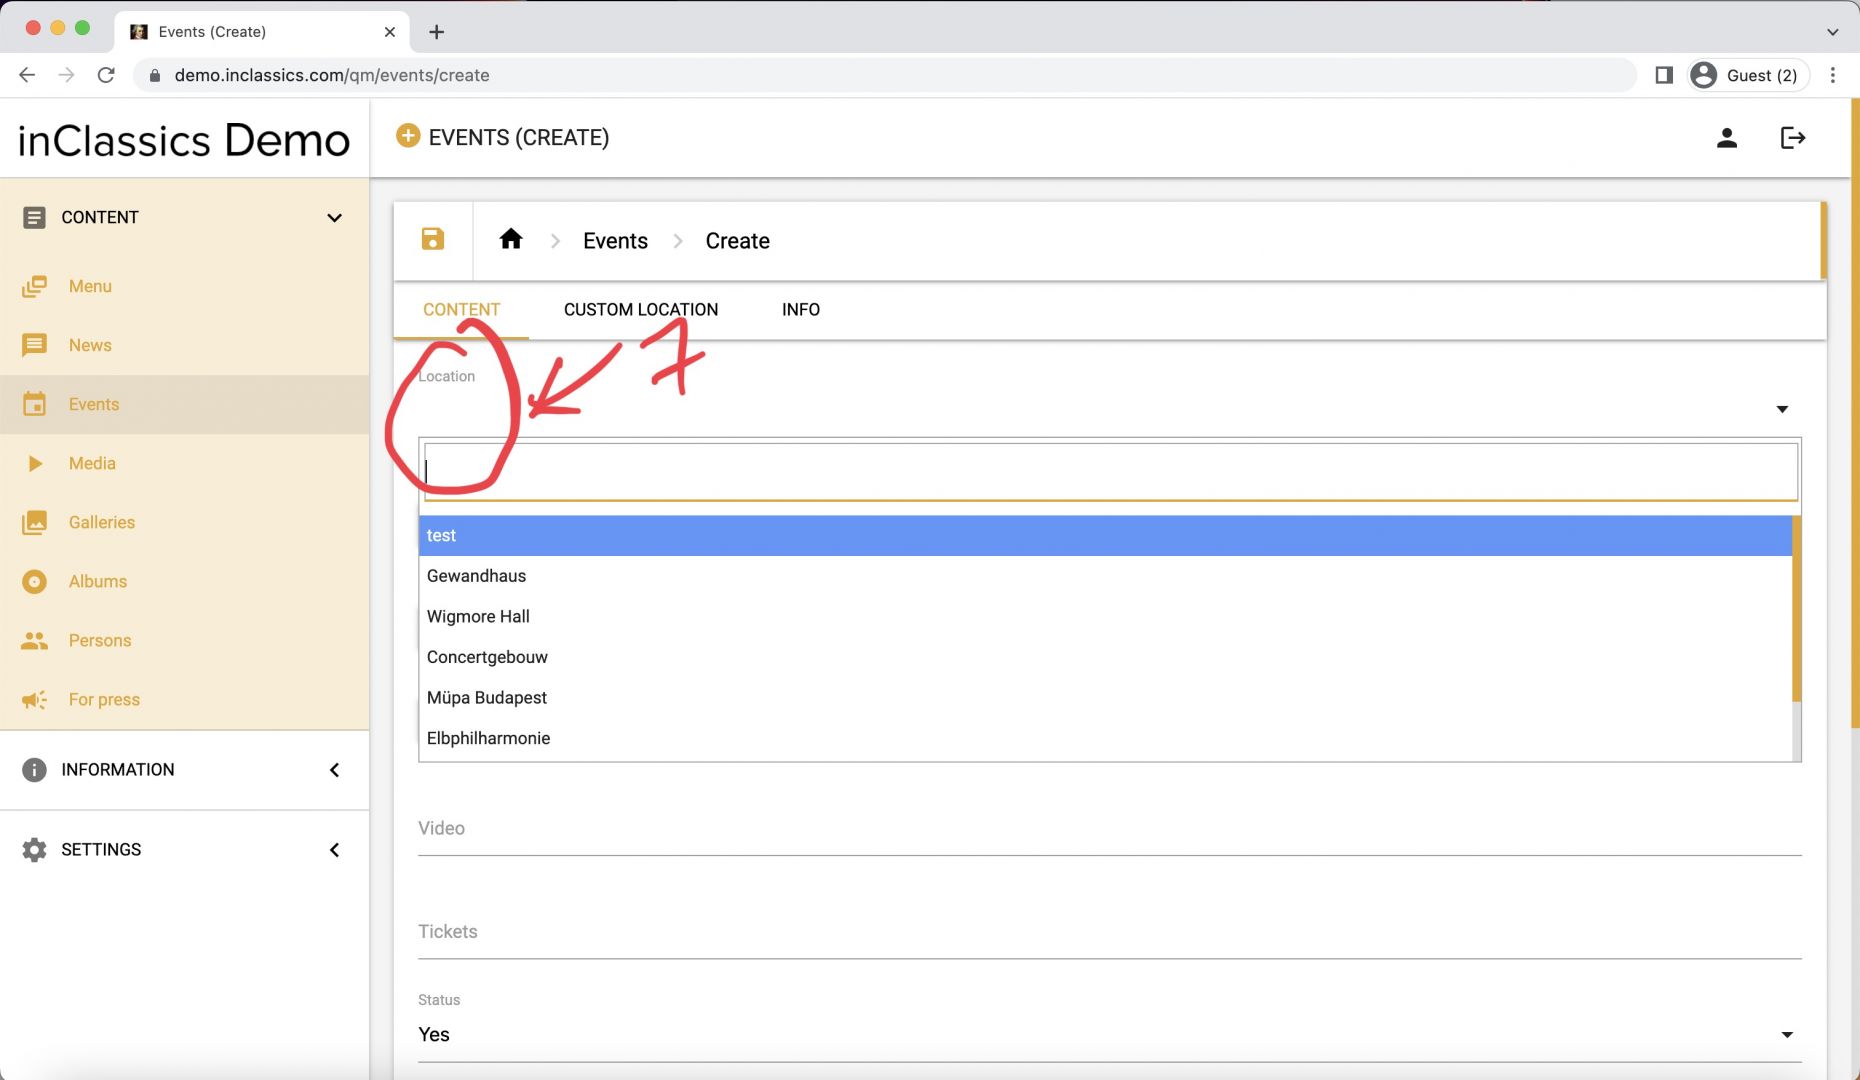
- add location (7) (choose a saved location from a dropdown menu or add a custom location information). Check the article or video about locations to learn how to create and manage your locations
Custom location tab
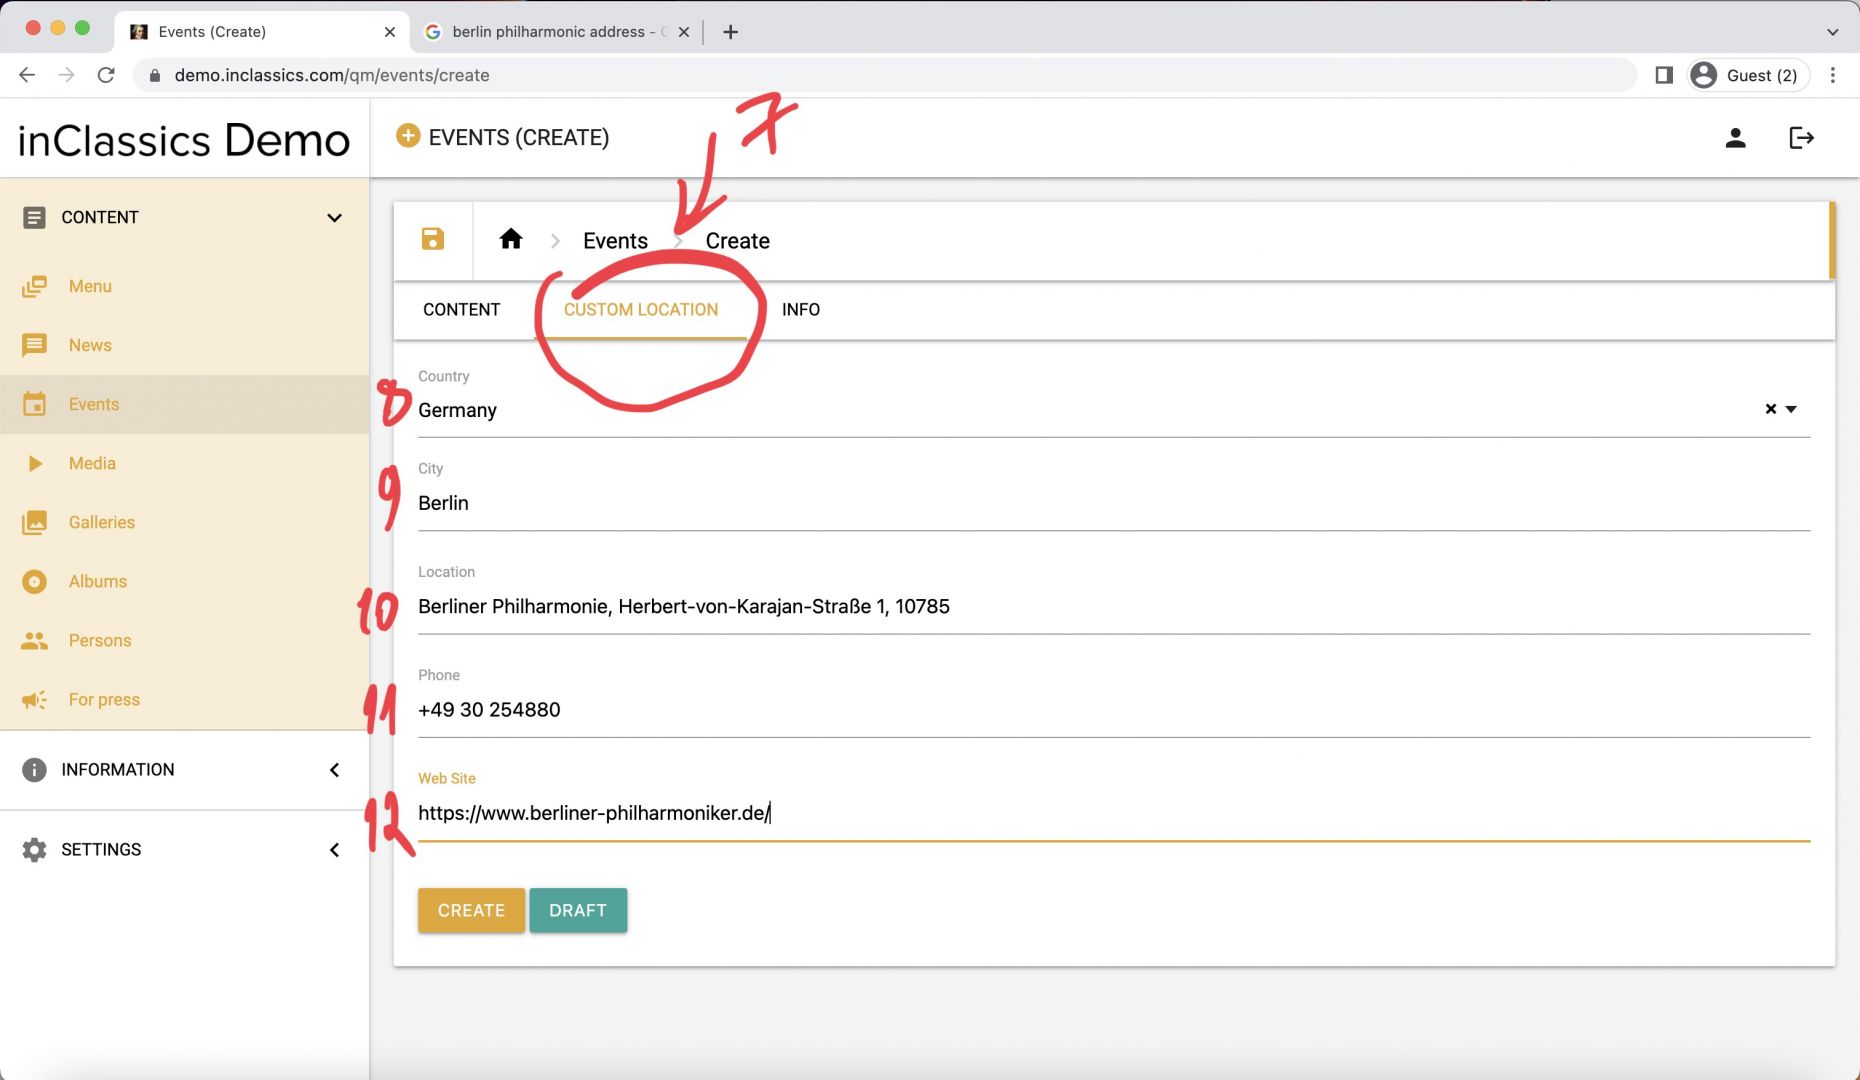
If you don't want to add a location into your database, you can add details about the venue in a custom location tab (7)
In a custom location tab, you can add:
- country (8)
- city (9)
- address (10)
- phone number (11)
- email address (12)
We recommend always saving locations you perform in, that way you need to only add the information once and reuse it in the future.
- Click create to publish your event
It’s Important to know that if an external link field is not empty, it doesn’t matter if you add extra content such as performers or programs. Clicking on the event, you will be automatically redirected to the external website.
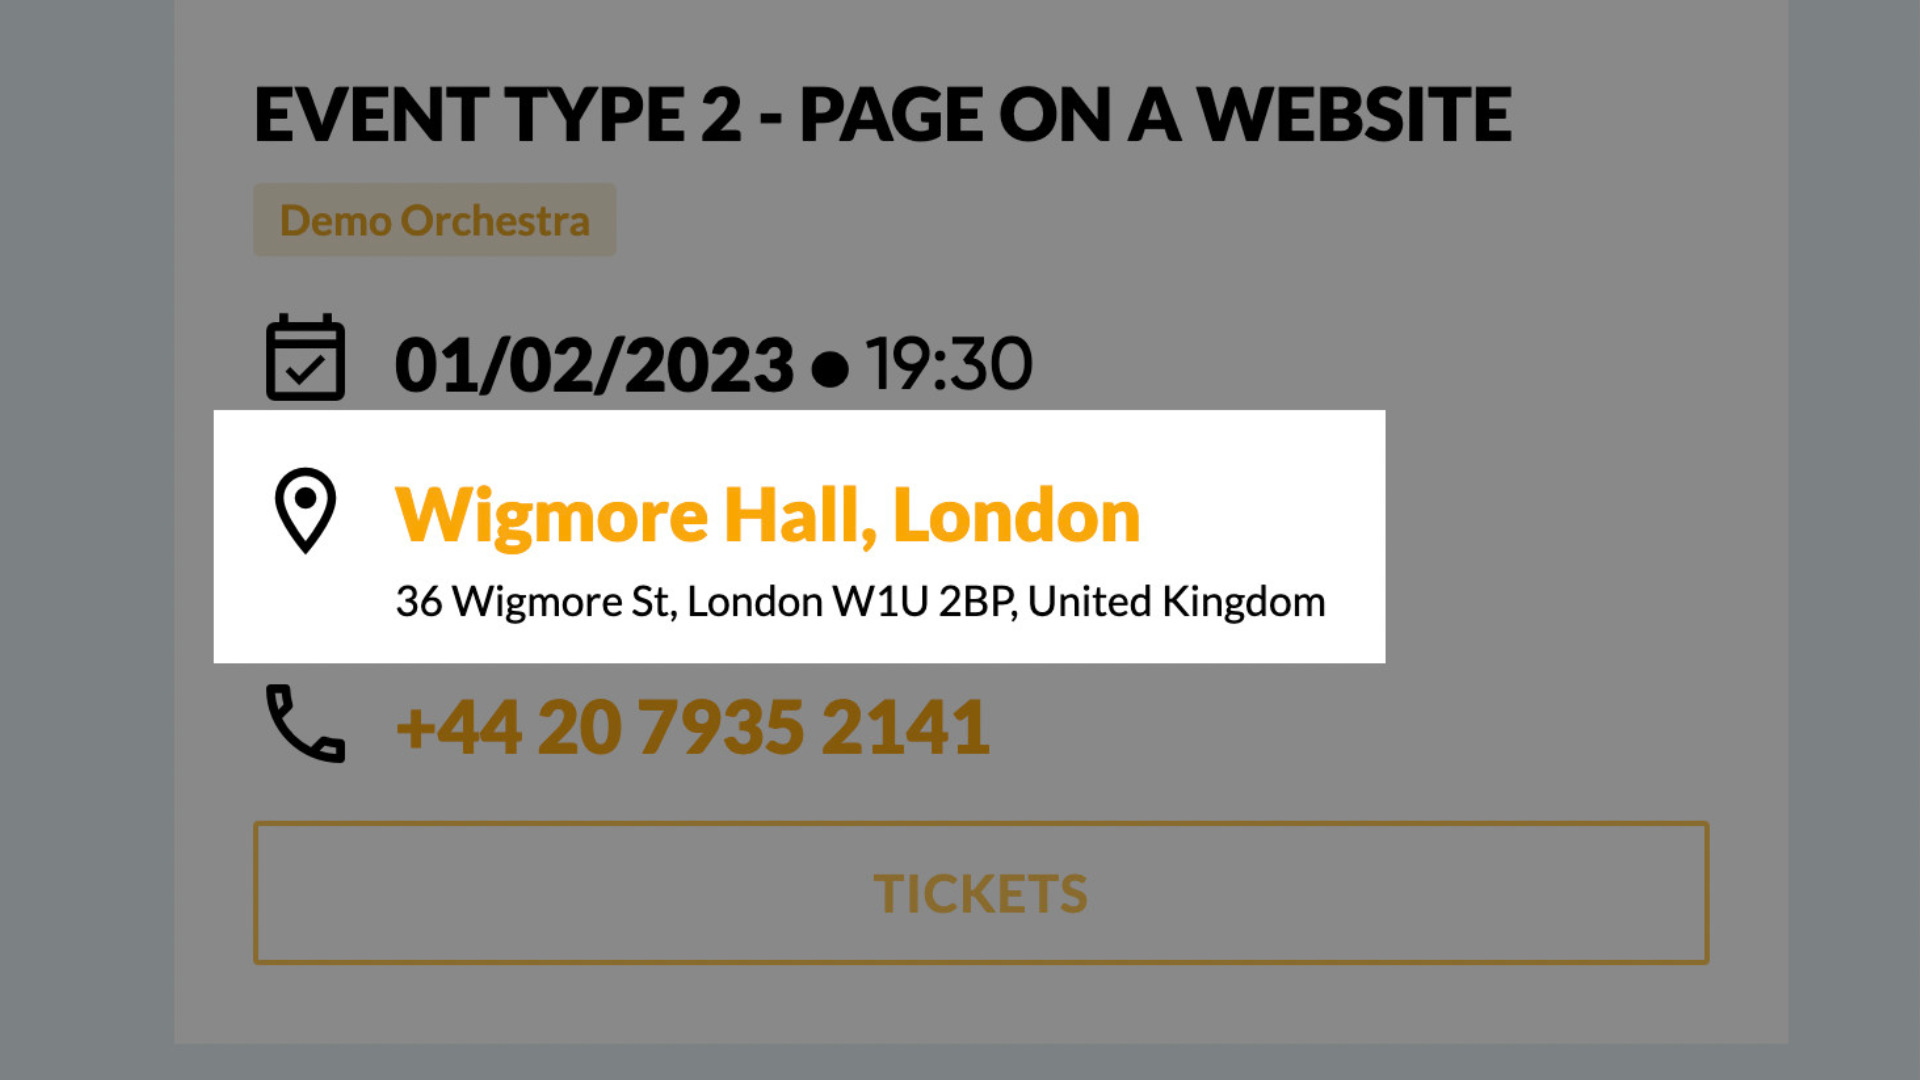
Create an event that has its own page on your website
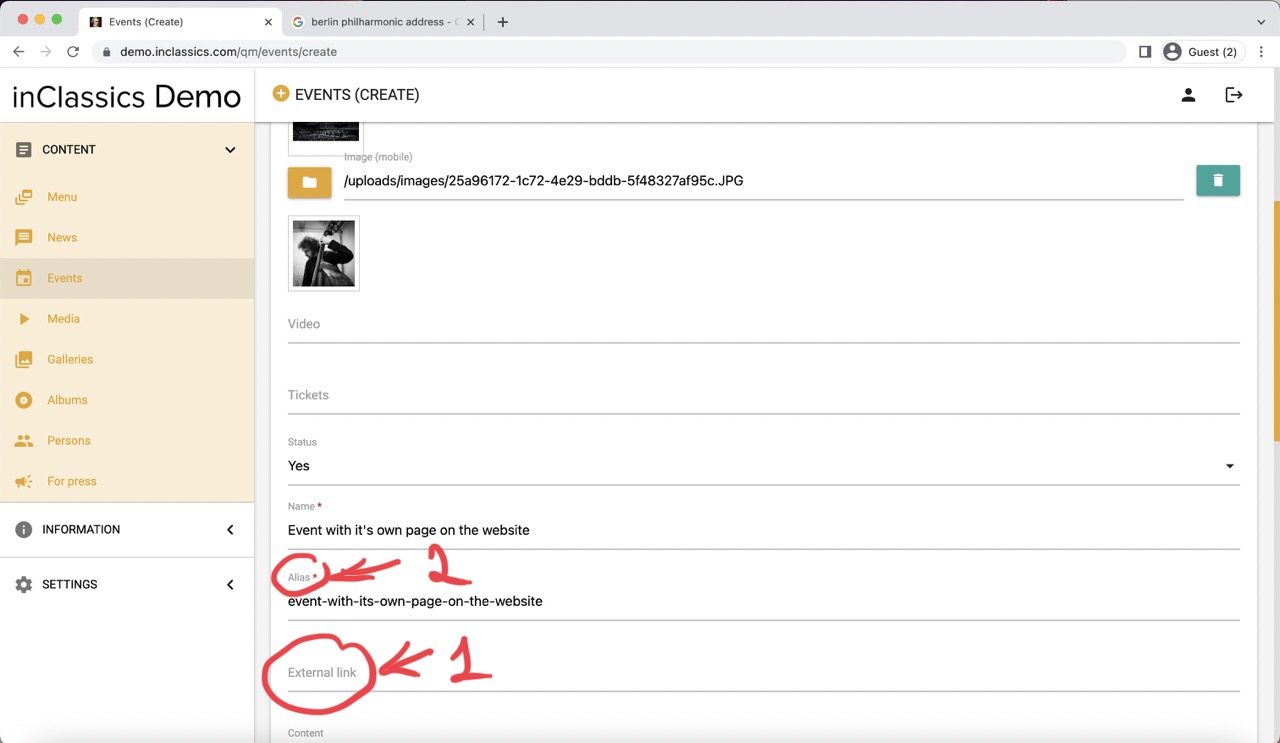
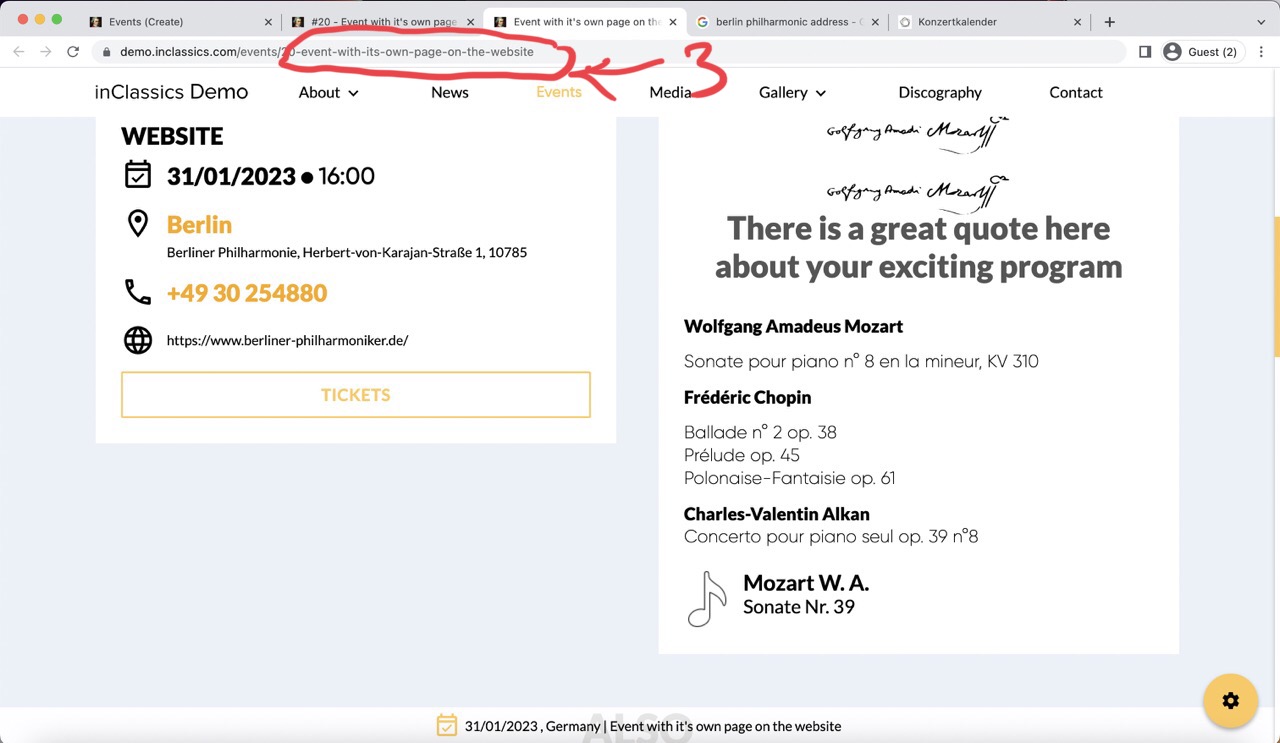
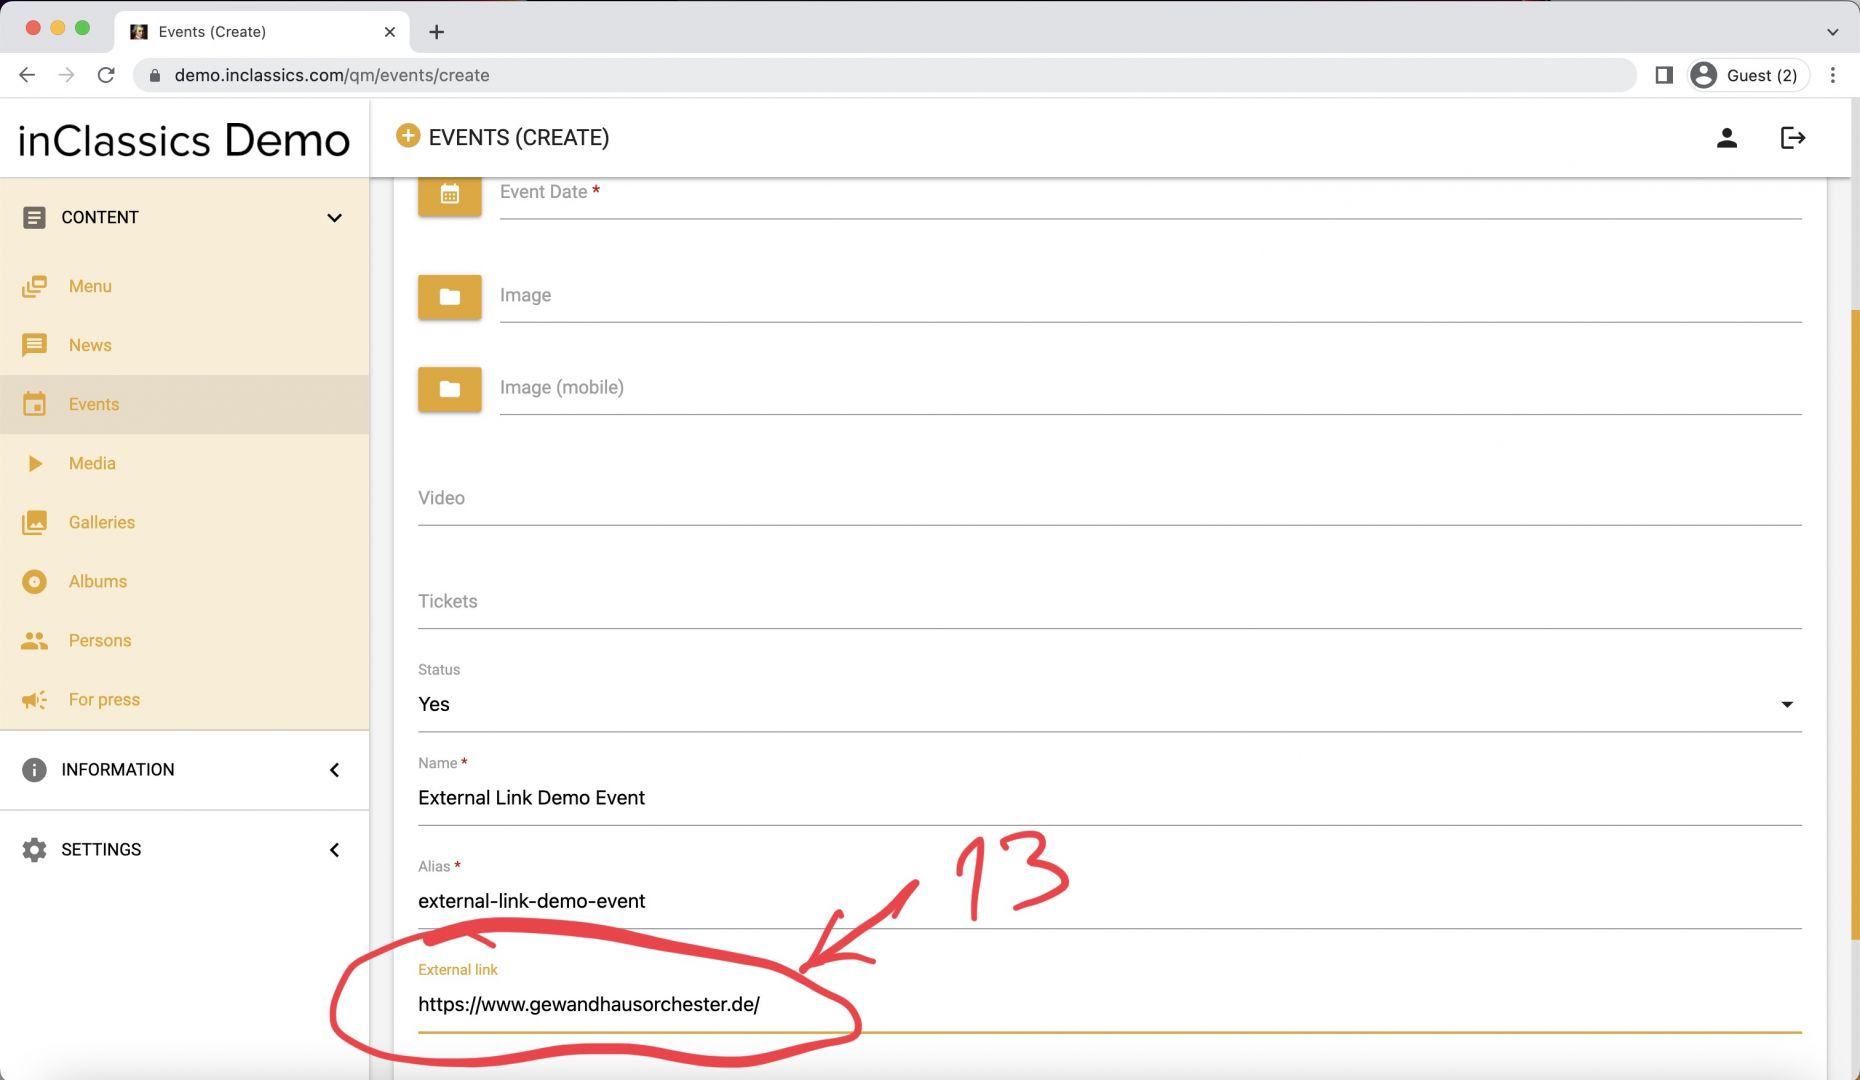
To create an event that has its own page on your website, you add all the same information as before except for the external link (1). If you want to add information like program and performers to your event, the external link field must be empty.
- the alias (2) here is the link to the event’s page that will be displayed in the address bar when people click on your event to read more information about it (3).
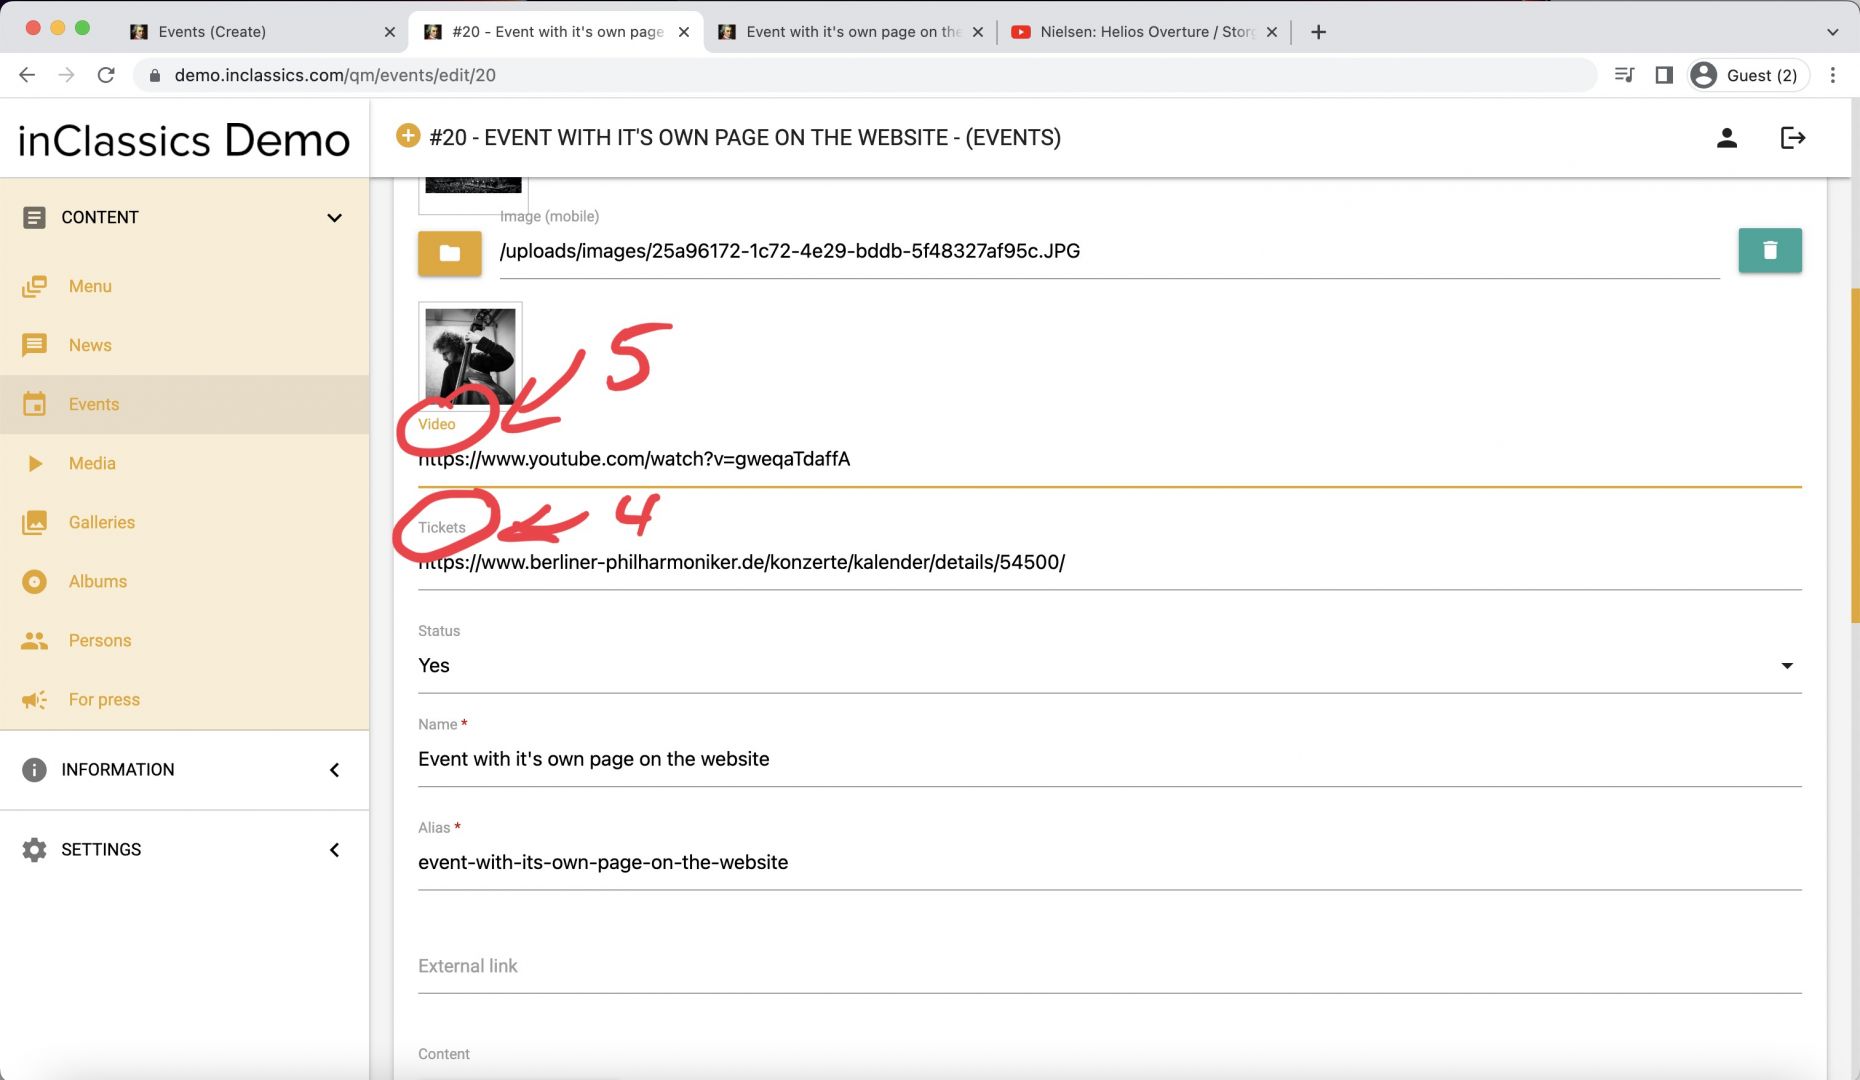
- you can add a link to the ticket sales (4)
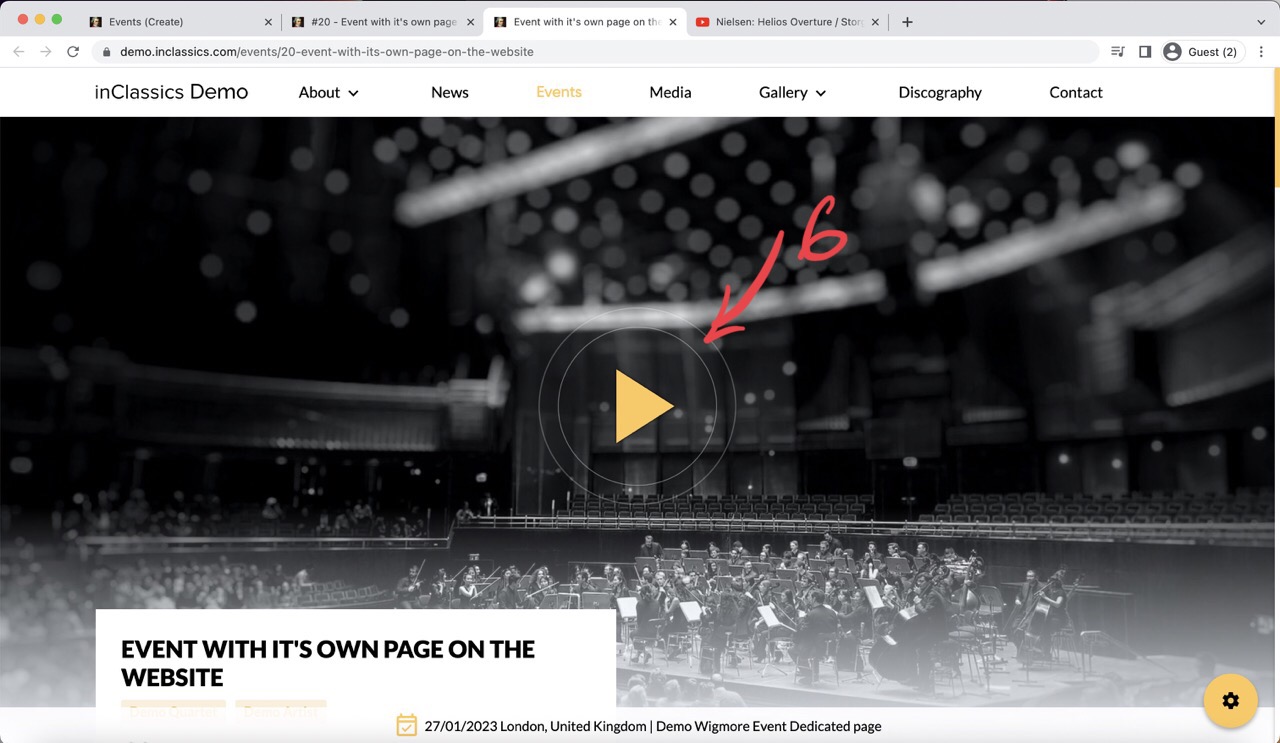
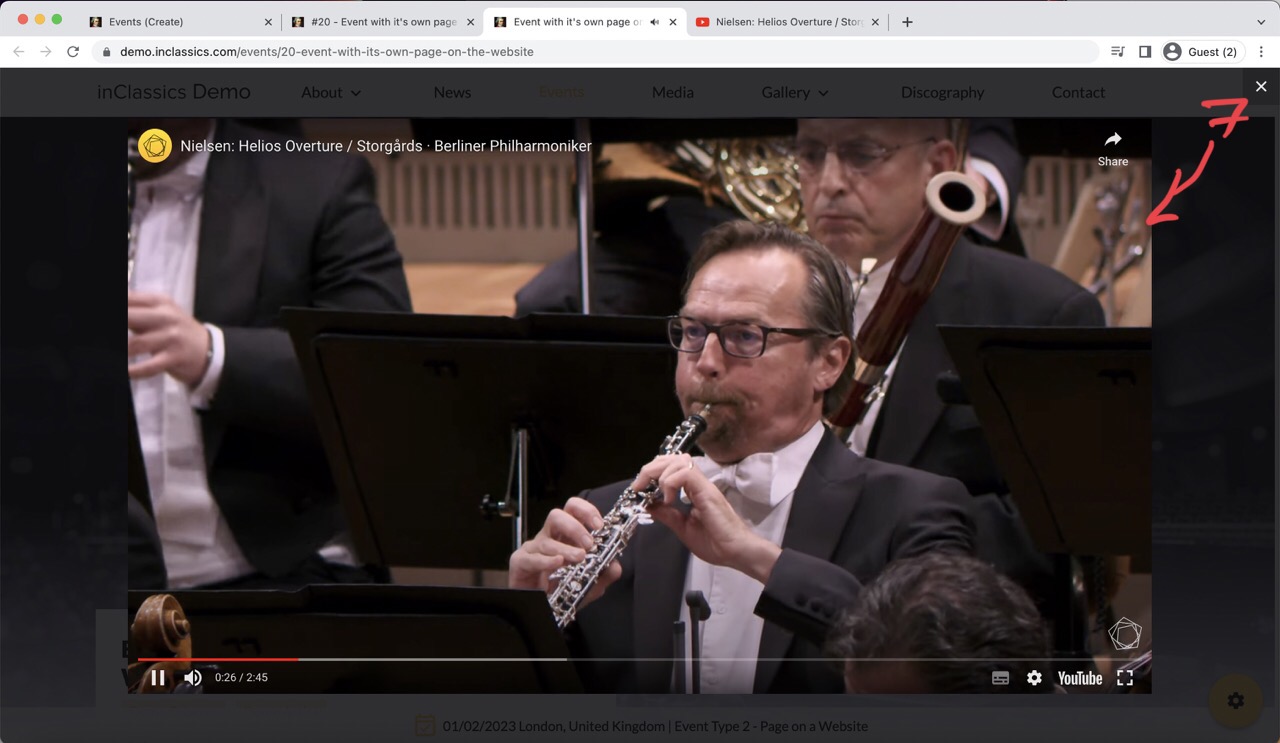
- to make a page more interesting, you can add a link to a video on YouTube (5). This will create a play button (6) in your event’s page that will display a video when clicked (7).
Add content to your event

To add extra information to your event:
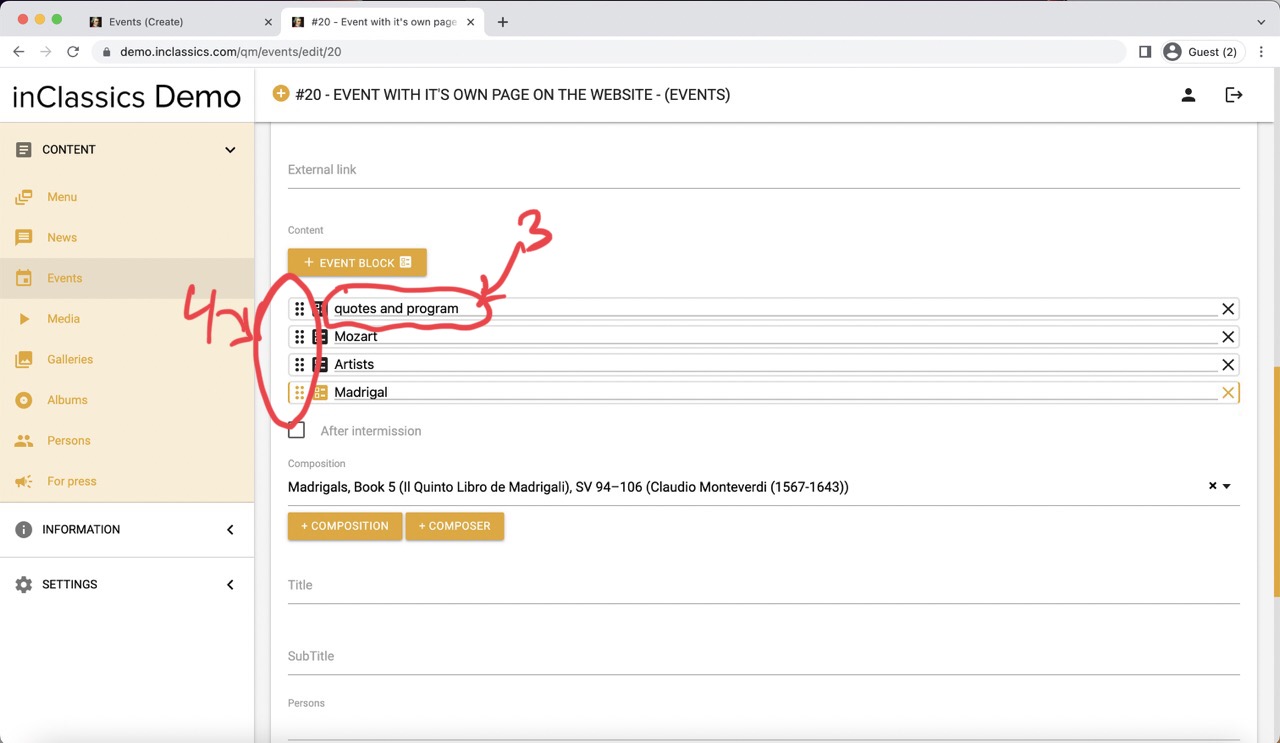
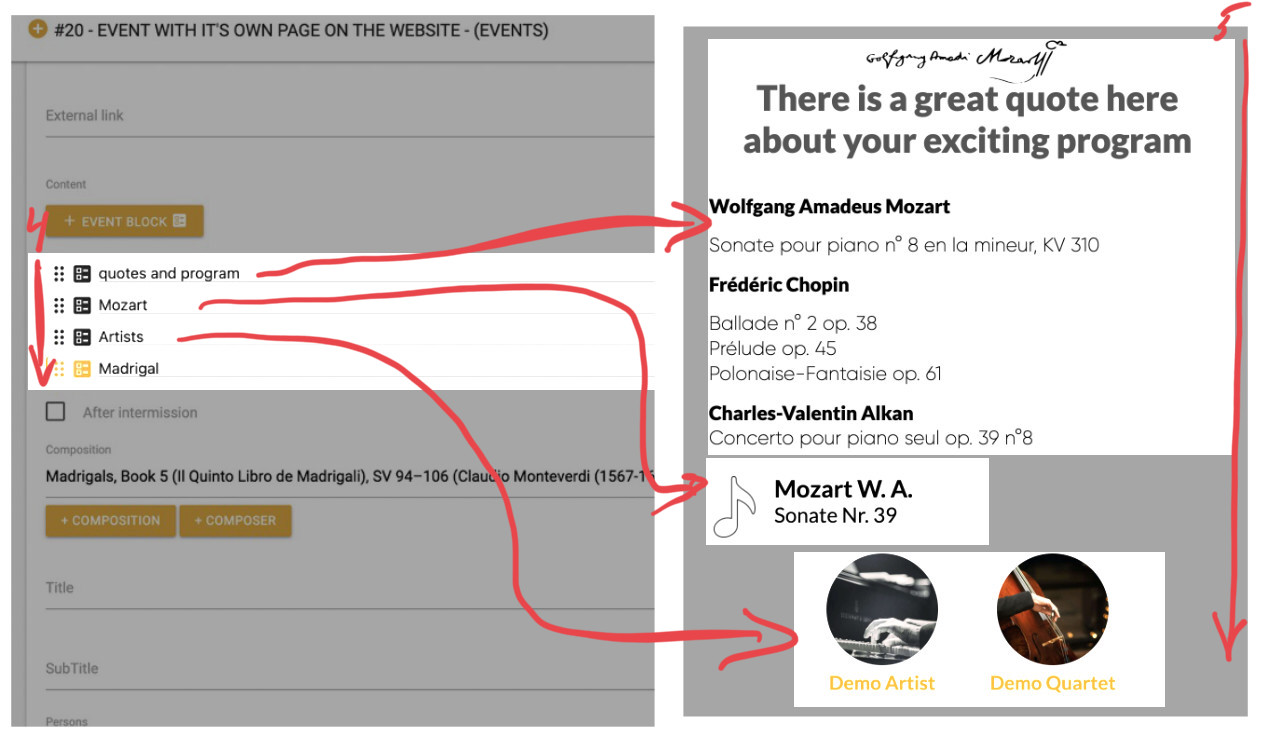
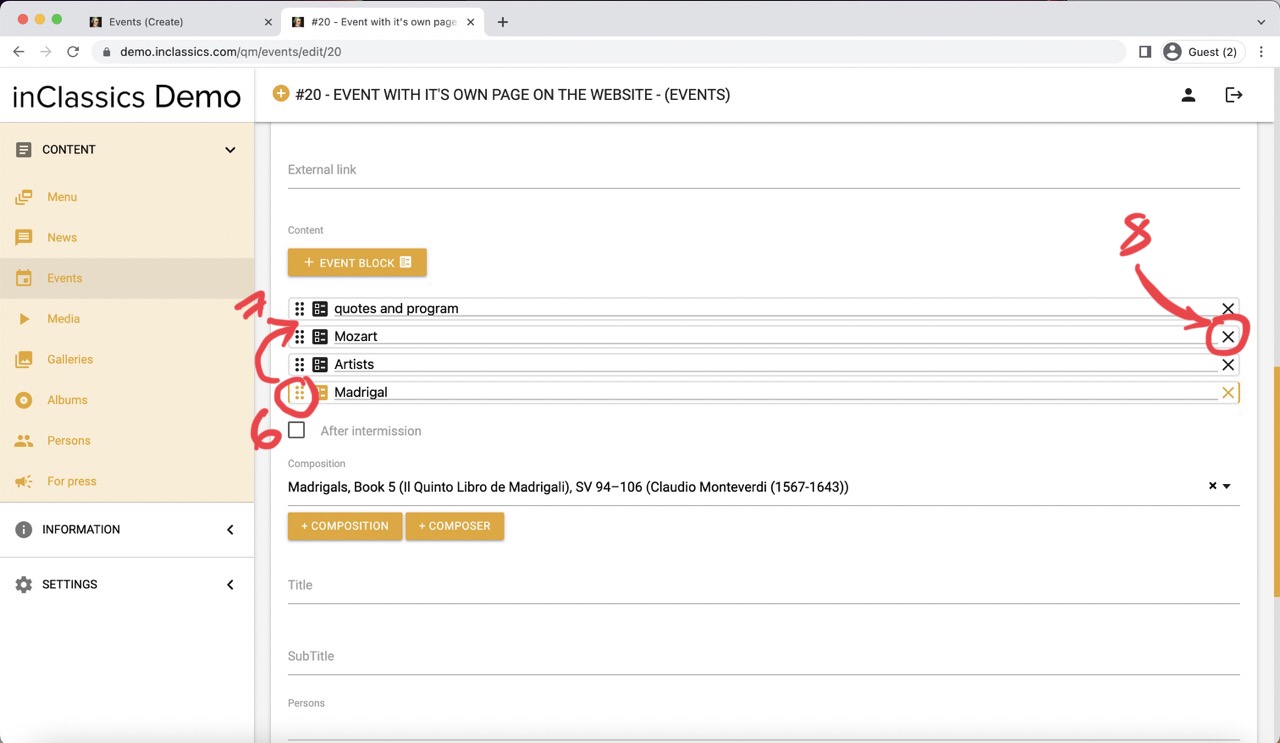
- click on the "event block" button (1)
This will create an event block (2) in which you can add program details.
- the text field (3) in your block is used only for your own reference. The text entered here is not displayed on your website. You can use this text field to mark your blocks.
You can add as many "event blocks" as you wish. As you information flows from top to bottom in your blocks (4), it will be displayed on your website in the same order (5).
- to change the order of the content you created, click and hold the three dotted icon (6) and drag your block to desired position (7)
- to delete block click on the X icon (8)
Types of content you can add


In each event block you can:
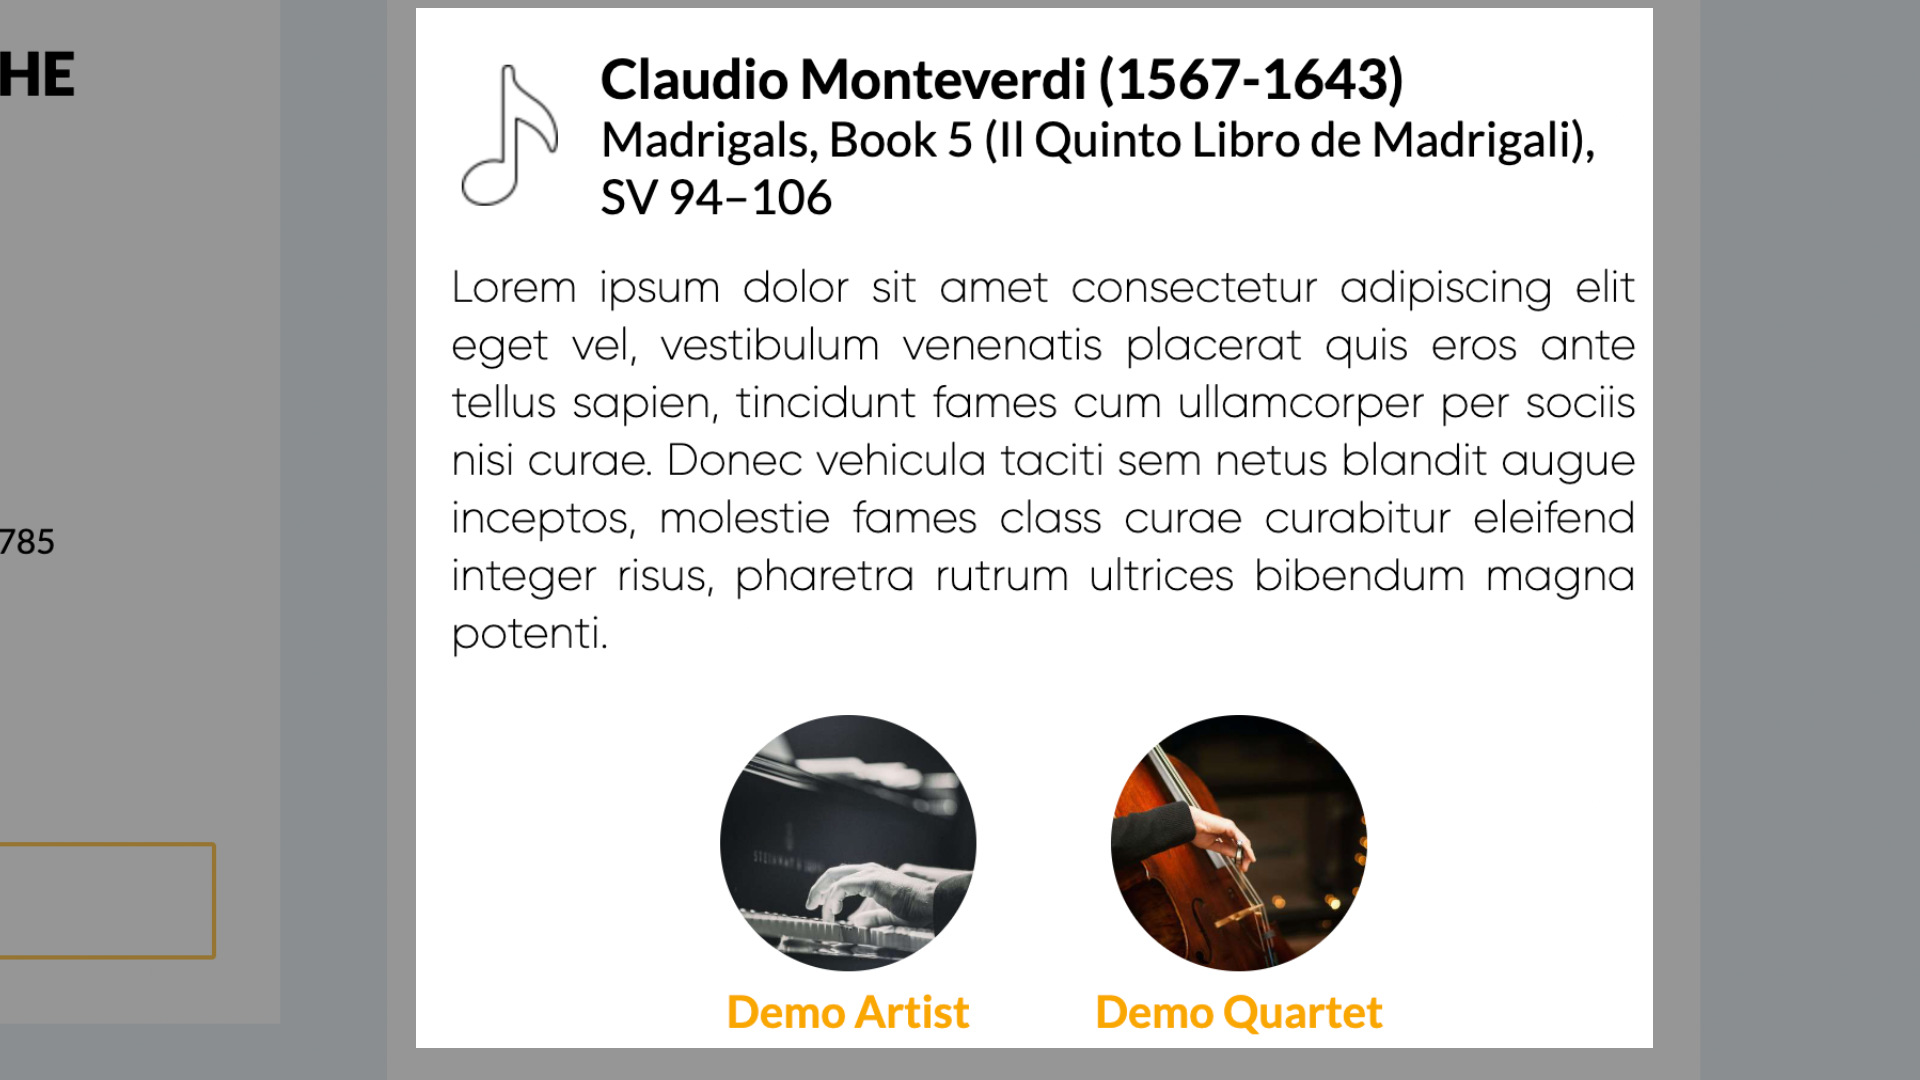
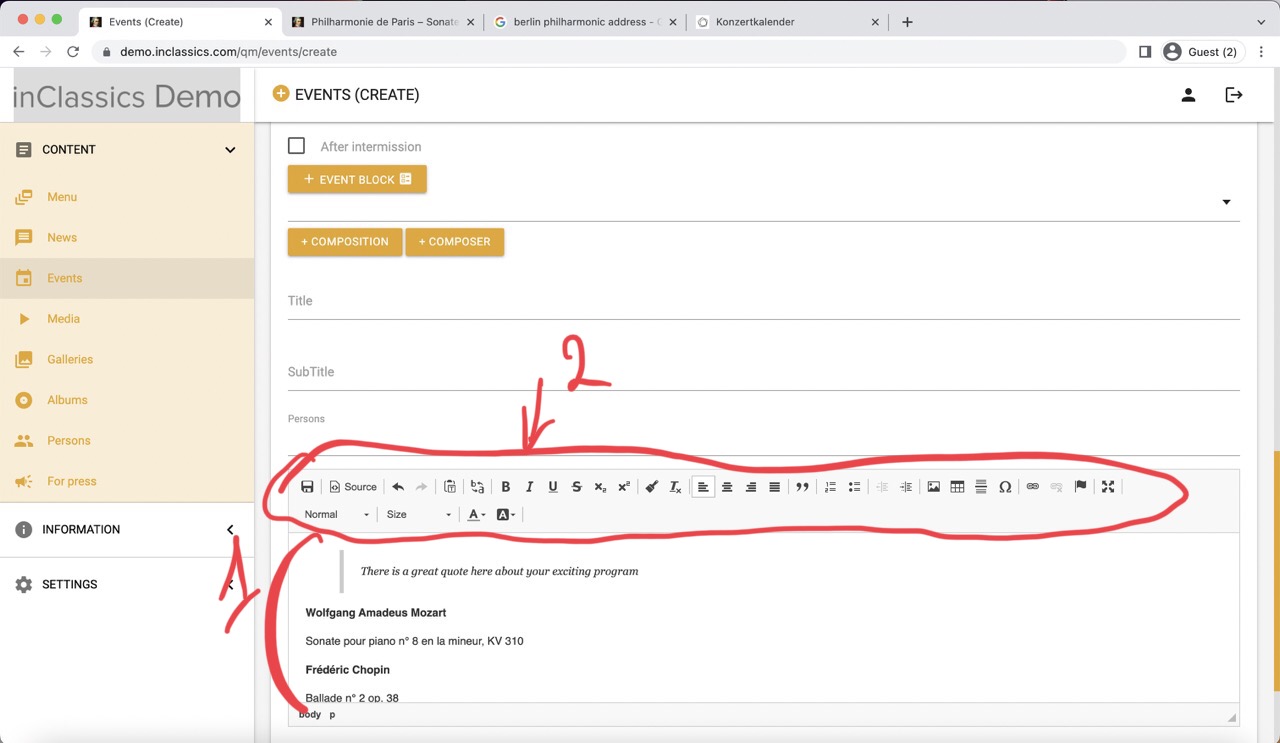
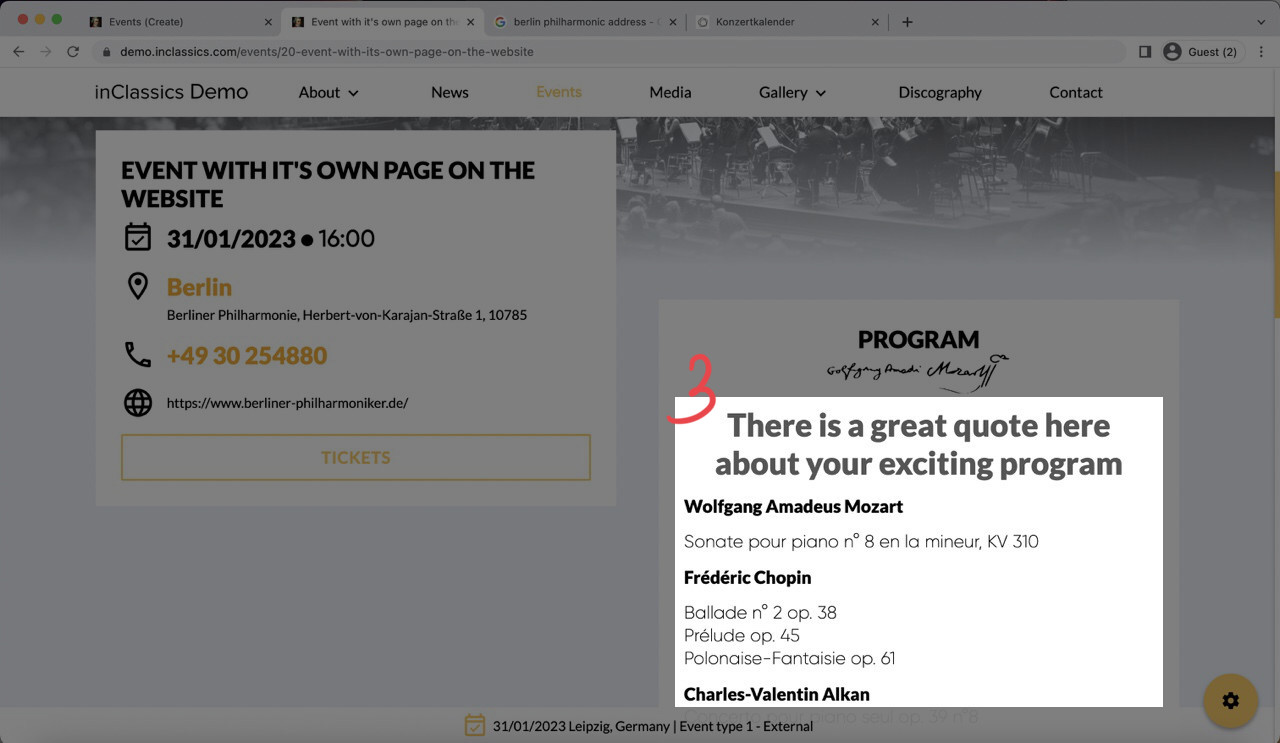
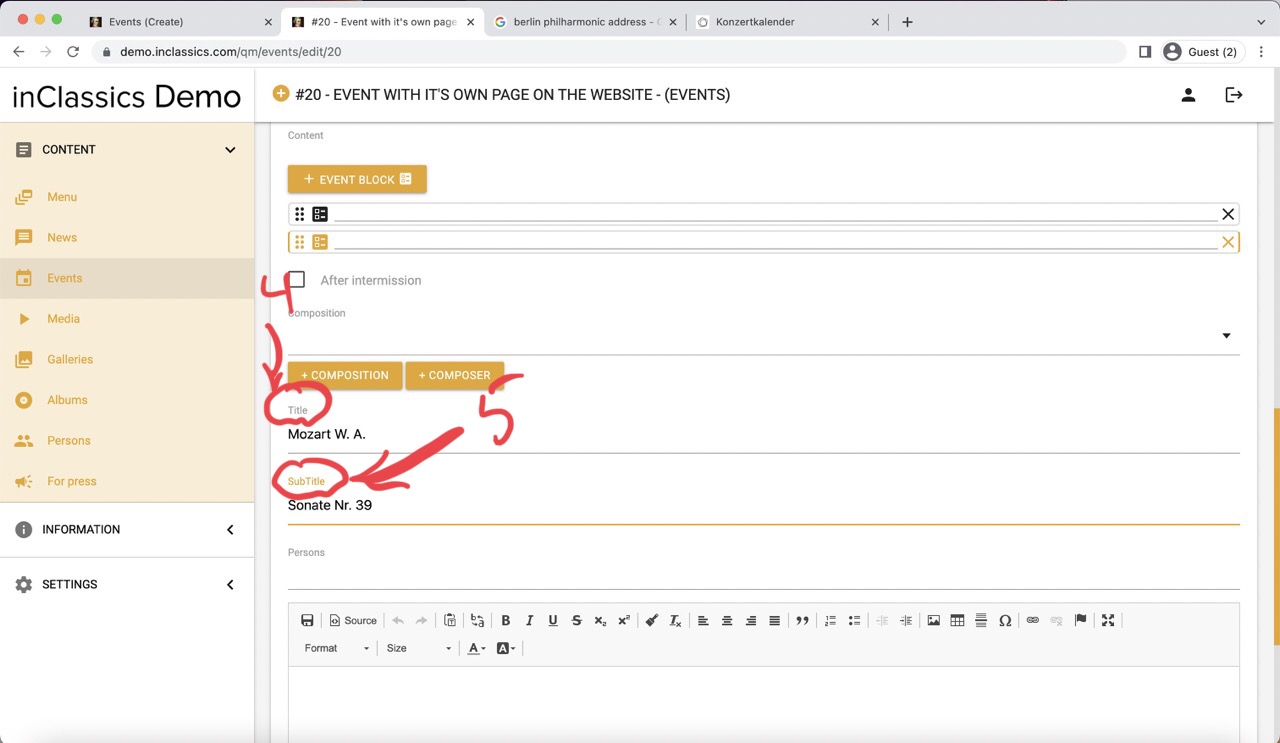
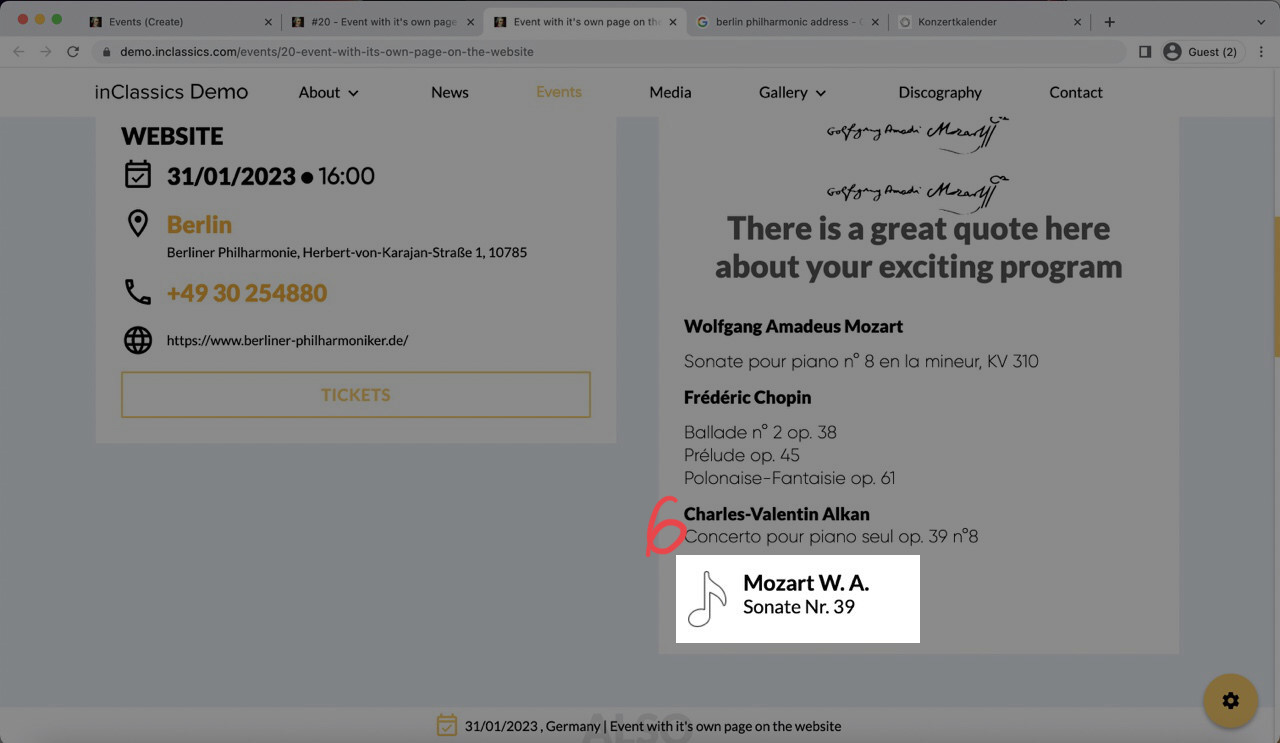
- add text content (1) and format it to your liking in a text editor (2). This is how it looks on your website (3)
- add a title (4) and subtitle (5) (e.g. composers and piece name). Your website will automatically add a style to it (6)
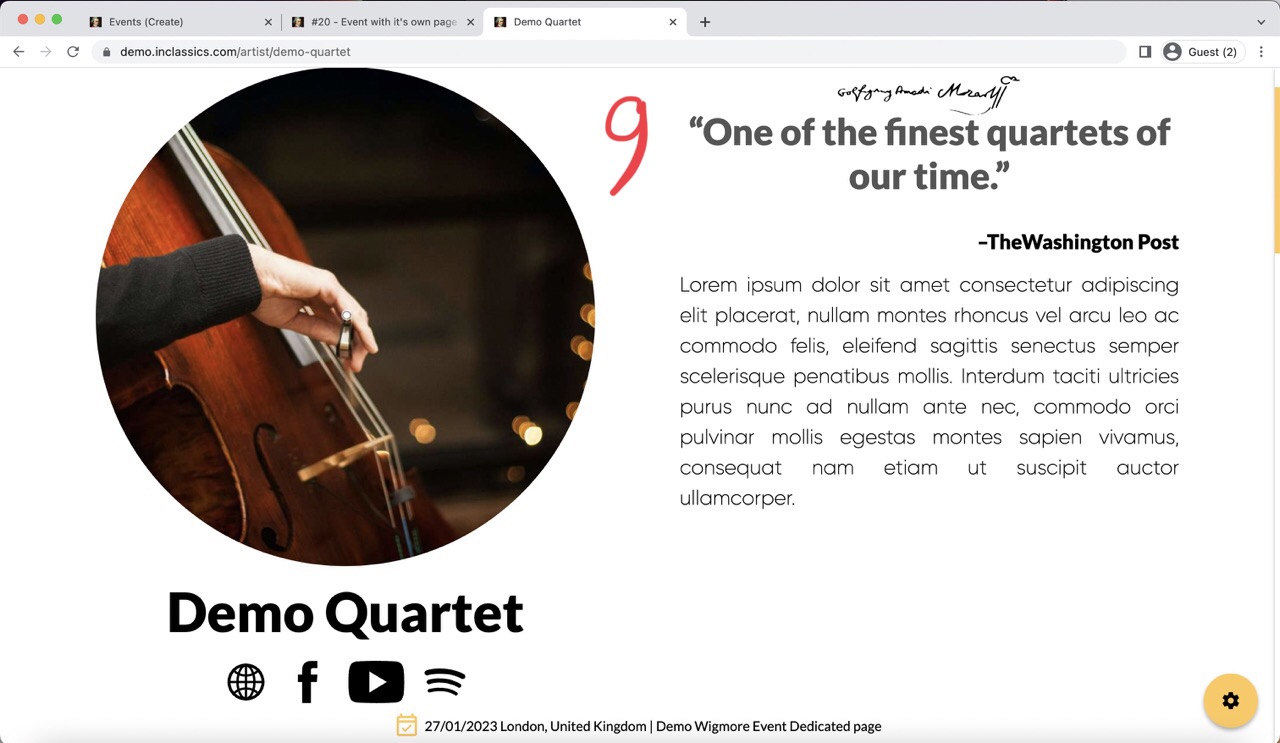
- choose artists (7) who perform during this event from your list of saved persons. Artists will be automatically displayed (8) an contain links to their profiles (9)
Read an article or watch a video on how to add persons into your database. If you often perform with the same artists or group, we recommend creating a profile for them as it adds valuable content to your website.
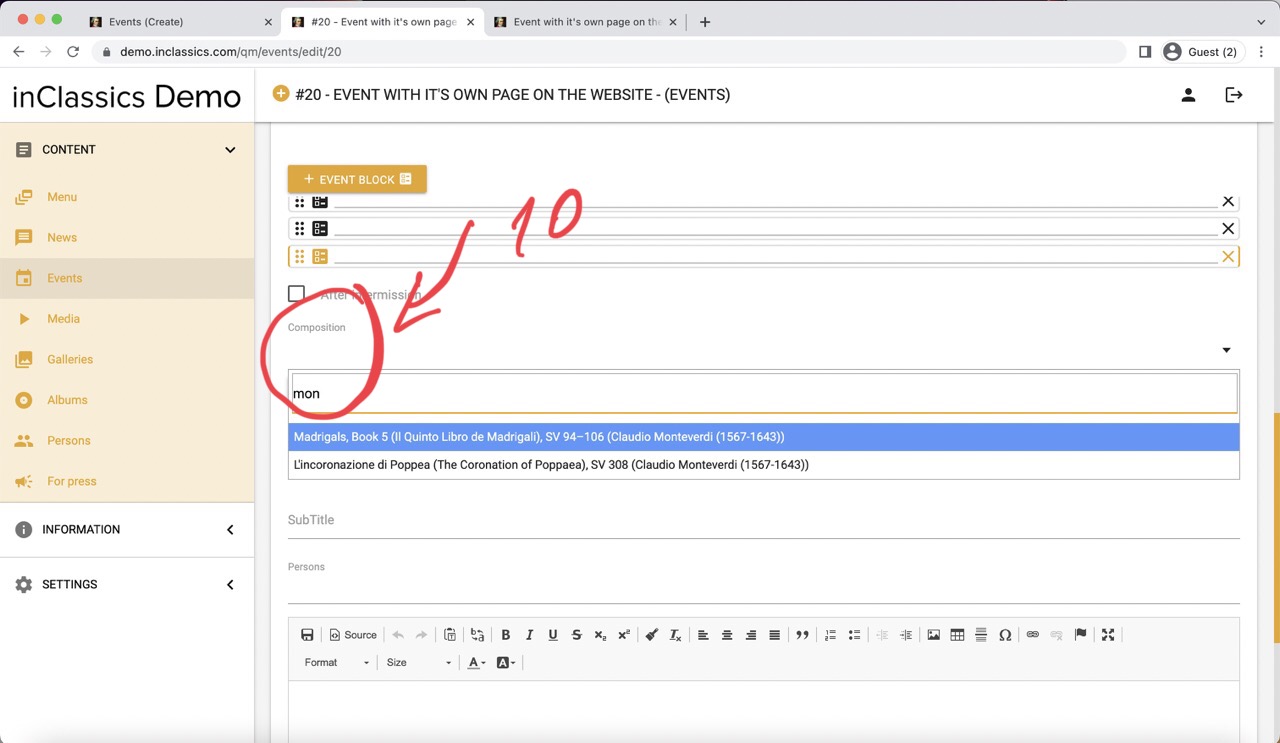
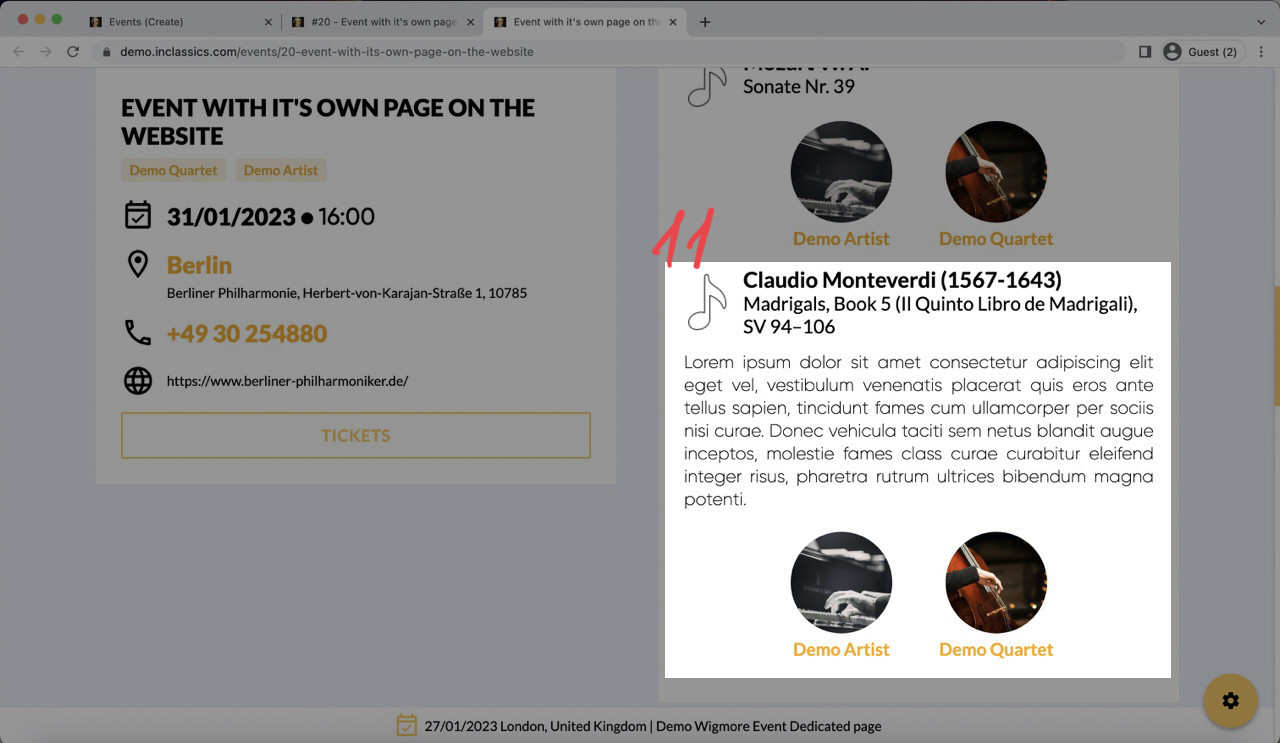

- choose a saved composition (10) from your list. It will be displayed in your event page with all the detailed you entered about this composition (11) (including composer, name, performer, program notes). If you are often performing the same pieces, we recommend saving them into your database so you can reuse them to speed up your content management process. Read an article or watch a video on how to save compositions and composer.
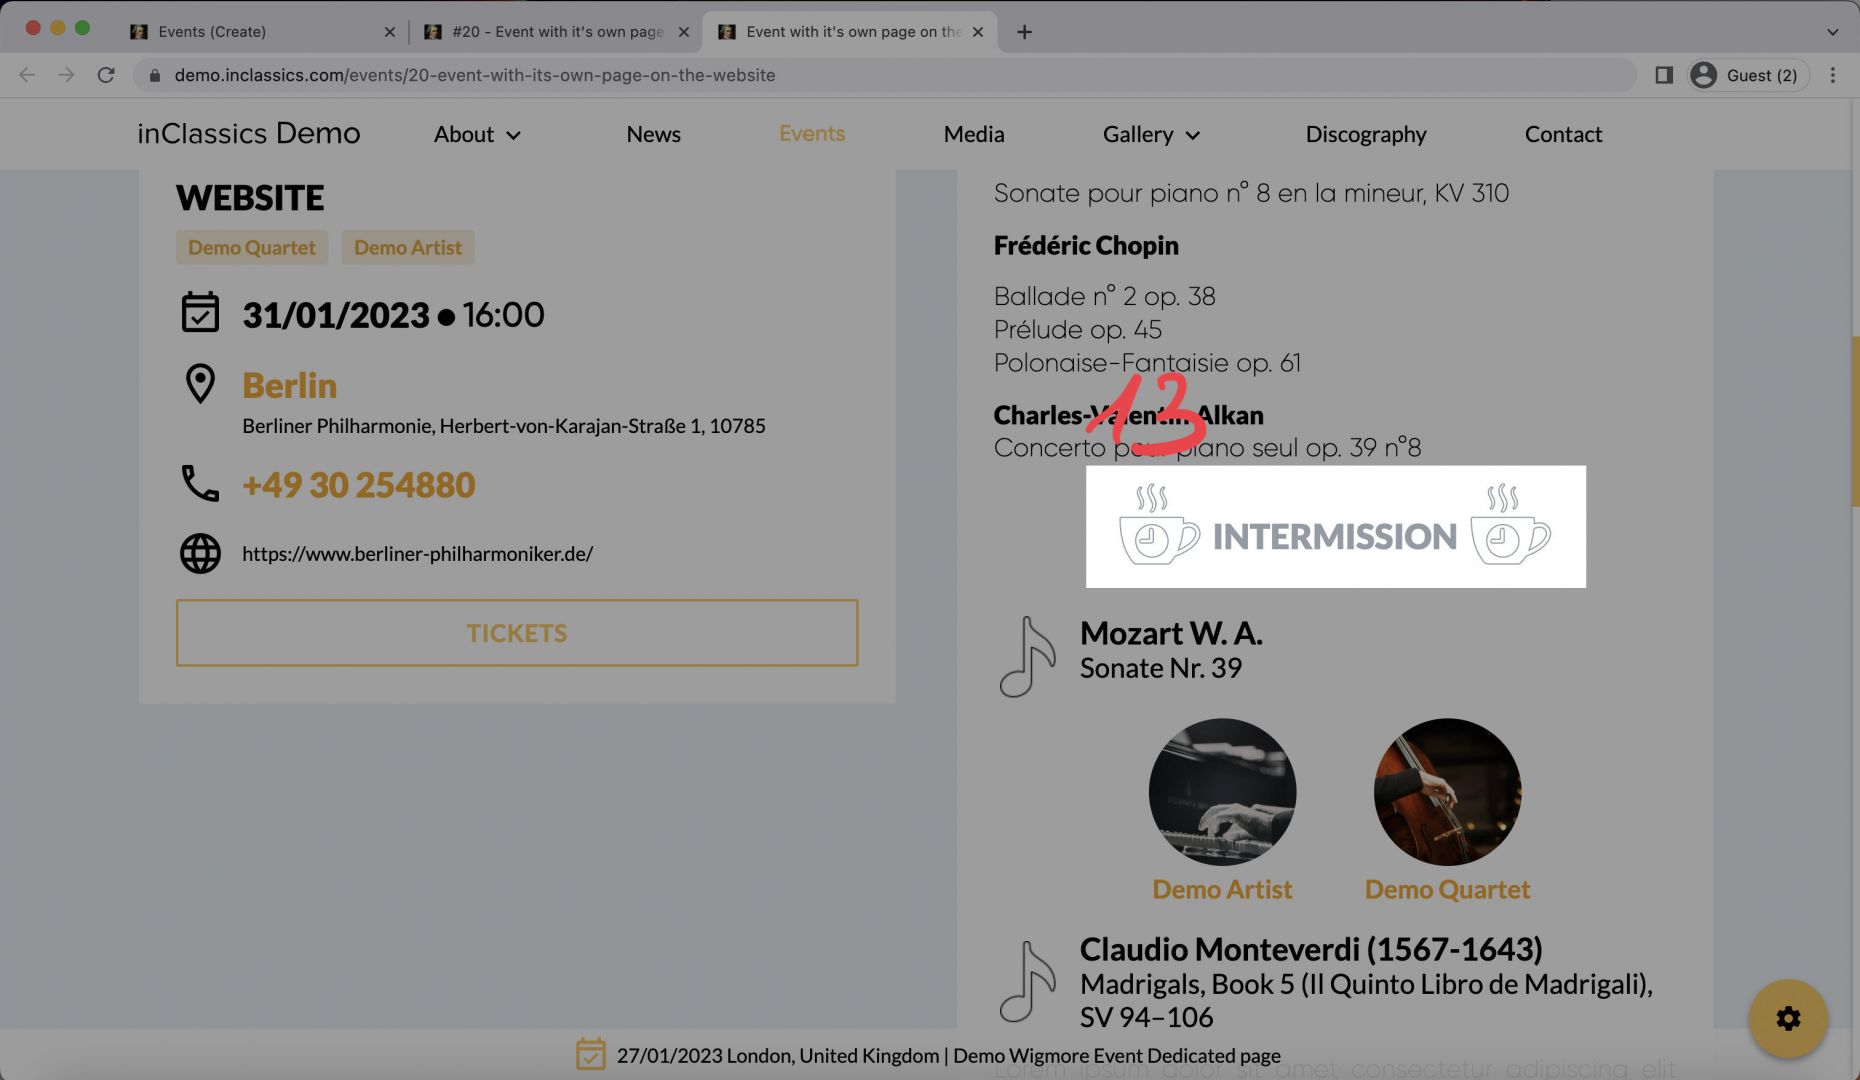
- check the “after intermission” box (12) to add the intermission sign to your program. This will create a stylized intermission sign in your program (13). Only check the box for the first piece after intermission.
Edit, hide, delete and copy your events
To manage your events:
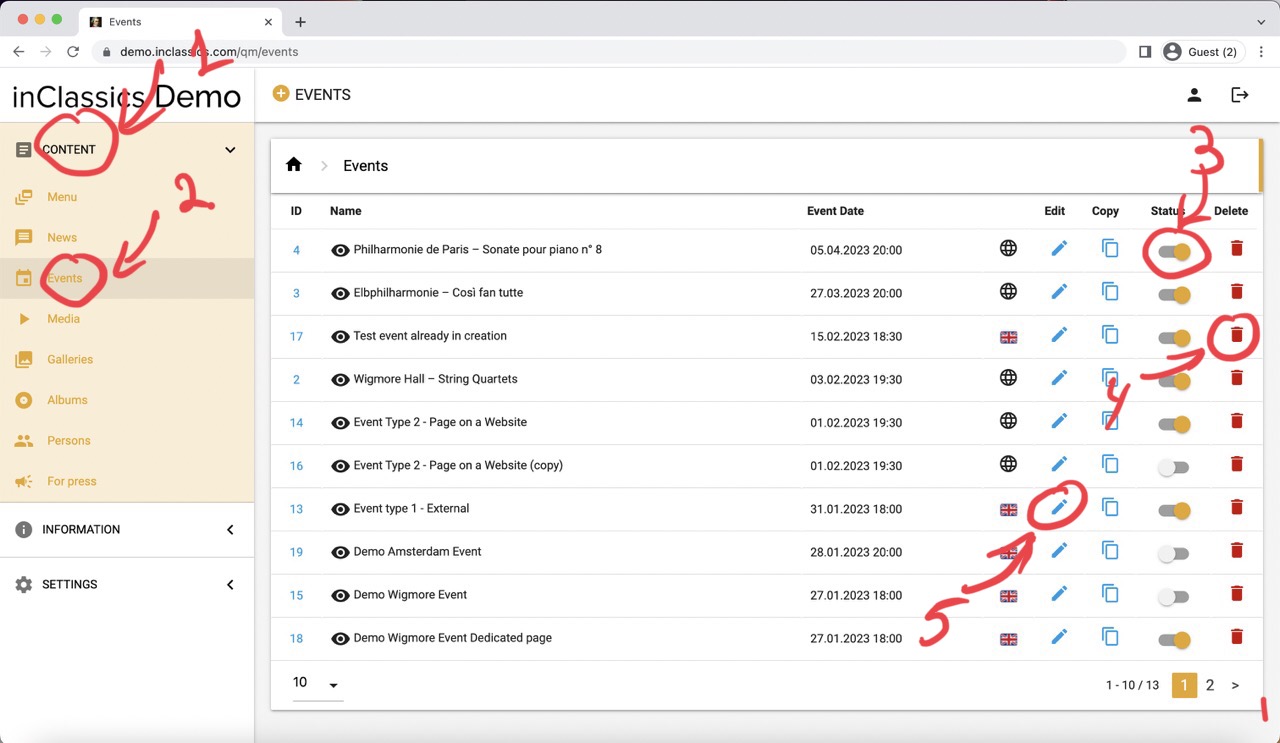
- go to the admin panel
- content tab (1)
- click events (2)
Here you will see the list of your events:
- hide and show the events on the website by clicking on the toggle icon (3)
- delete the event by clicking on the bin (4) (this action can not be undone)
- edit event by clicking on the pencil icon (5)
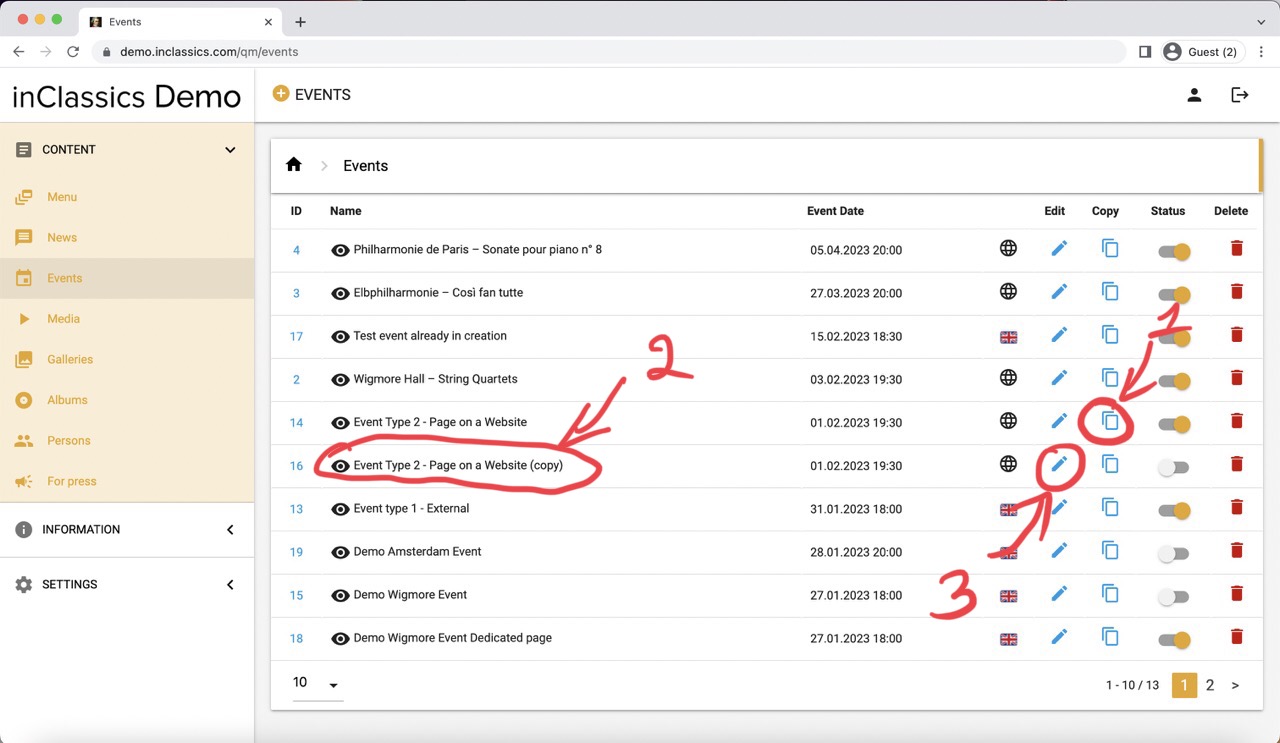
You can duplicate your event (1)
This will create a copy of the event (2) with the same information and program you entered. This is helpful if you perform concerts with a similar program.
Click on edit (3) and change any field you wish (such as location, date and time, alias, the name of the event and anything else you wish).
Multilingual website
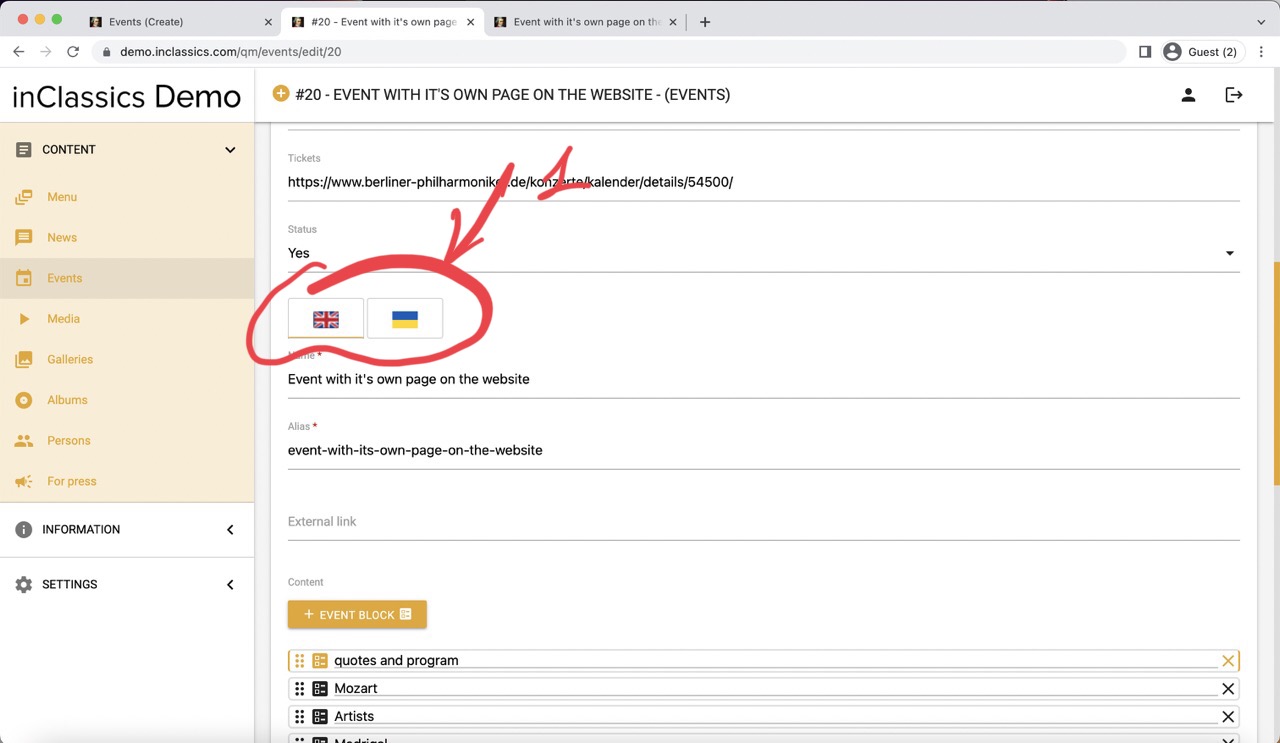
If your website is multilingual, toggle the flag icon (1) and add the content in the respective languages.
Please note, that only the content that needs translation is under this flag toggle. The content like ticket sales links, date and location doesn’t need to be translated.
Edit the Events Page itself
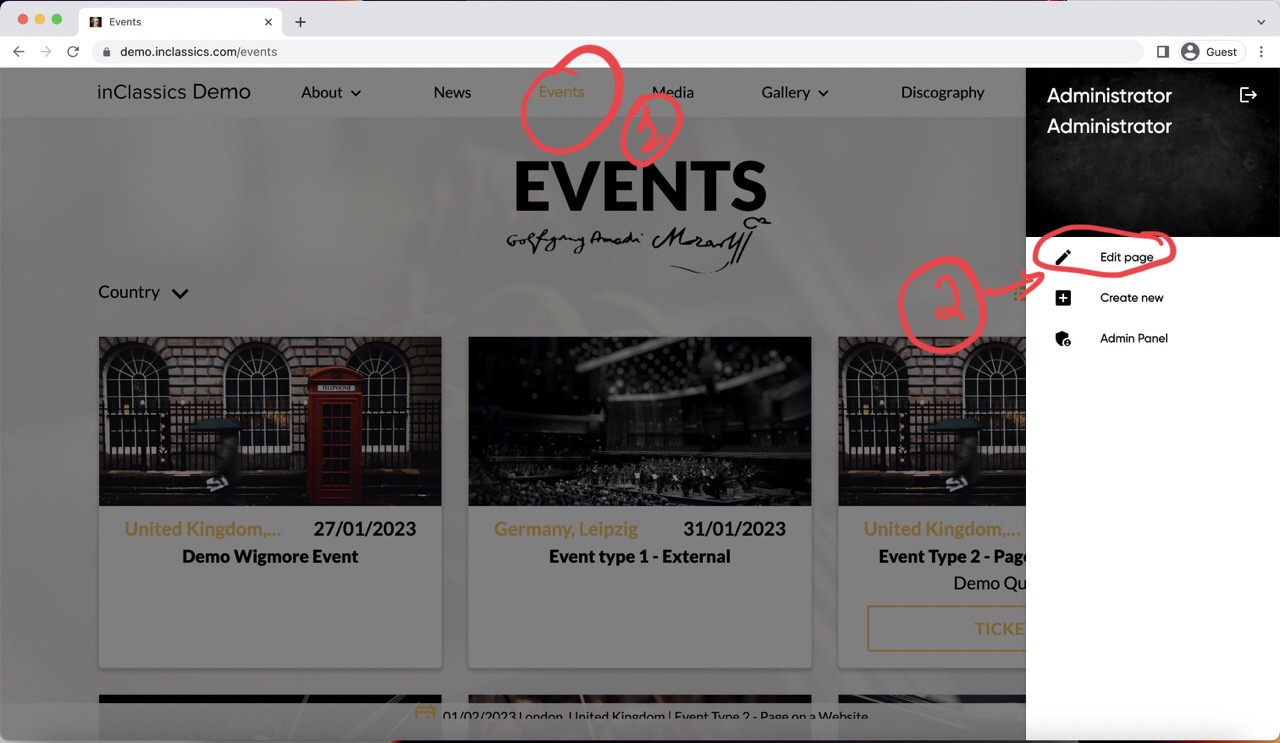
On your event’s page itself (the page where you see the full list of your events) you can add, change and remove the background image or change the pagination.
- go to your events page (1)
- click on settings button
- click "edit page" (2)
- go to the main tab (1)
- delete current picture if you have it (2)
- upload an image you want (3)
- change pagination (how many events you want to display on one page) (4). We recommend leaving it empty and using default settings.